Thursday, November 29, 2012

Come Blow Your Horn!

Today I have another New Year project for you. It is a Snowman Shaker. He is getting ready for the clock to finally strike midnight so that he can blow his horn and ring in the new year! He is constructed the same way that all of my other shakers are made. If you need a refresher course, check here, here and here.
 
 
Supplies:
felt
scrap of fabric for the hat
red and white pipe cleaner, large kind, (Hobby L carries the kind that are already twisted together)
vintage sheet music
crepe paper-red
embroidery floss-eyes, eyebrows
tulle
12"stick
pom poms
plain paper
glitter
black paint
stuffing
white glue- I use Aleene's
mod podge
 
 
1. Cut out all felt pieces (face, back of head, nose, cheeks and mouth).
2. Cut a side strip out of white felt (3/4" x 12"-this may be a little long. You will cut it to size after you have finished sewing it to the face piece).
3. Construct shaker. ***Stuff cheeks lightly as you sew them on. ***Stick was painted red with white polka dots and glitter was added.
4. A 9" candy cane striped pipe cleaner was wrapped around the "neck" two times. I found that tightly wrapping it secured it enough where glue was not necessary, but you can always add a drop of glue. Fold tip of pipe cleaner into an 0 shape to form a little hand.
 
Getting ready to blow that horn!!
 
5. Cut two strips of tulle, 5 1/2" x 32"-I buy the tulle that comes on a spool at Hobby Lobby when they have it on sale. Place one strip on top of the other, fold in half length wise, now your strip is 2 3/4" x 32. Sew a running stitch the length of the tulle making sure to leave long tails.
6. Gather the tulle and place it on the snowman's neck between the pipe cleaner and head. Tie securely in place.
7. To make the horn, cut one out of plain paper and one out of vintage music sheet. Mod podge the two together. Do not apply mod p to outside yet. This is the tricky part, now glue the ends together overlapping one side a little. You can use clothespins to help hold the ends together, be careful and don't glue clothespin to horn :) Let dry.
 
He only has one arm. Two made him look awkward *<:)
 
8. To make fringe, cut three 7" strips of crepe paper. Lay them on top of each other. Start snipping to make fringe being careful to stop just short (about 1/4") of the edge on one side.
9. Glue one layer at a time inside of horn. This is also a little tricky, just be patience and work slowly.
10. Paint tip of horn black. Hot glue works great here, just be careful to not glob it on. Glue horn to hand.
11. For the hat, glue patten onto a fabric scrap. Try not to let glue soak through, use glue sparingly, but making sure to coat paper thoroughly. Let dry and cut out.
12. Glue into a cone shape, again this will take some patience. Use clothespins to help hold so that glue can dry.
13. Glue hat onto head. I found that just gluing the front and back worked the best. Do not worry about the sides.
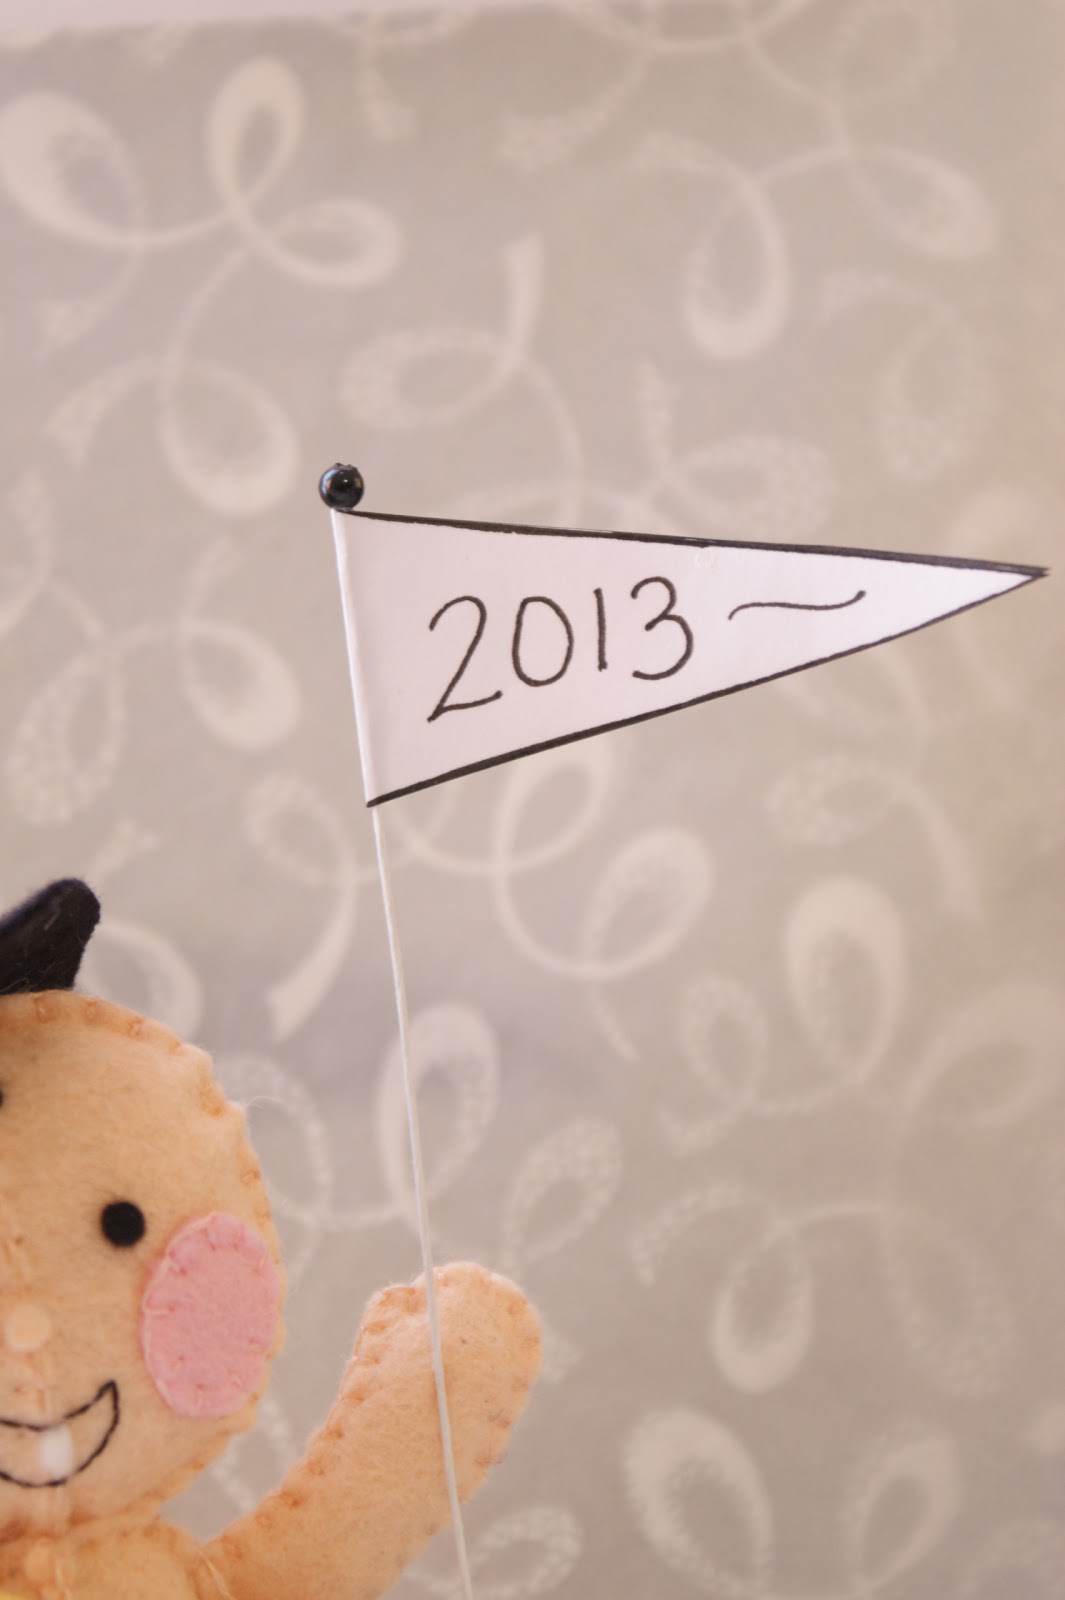
14. Glue pom poms on (hot glue works best here, be careful use sparingly) and finally glue Happy New Year banner on using white glue. Adjust the arm if necessary.
You are finished!!
 
In this picture you can see the center hole that is cut out of the mouth. I used my tiny hole punch to cut that tiny hole.


Happy Crafting and enjoy this wonderful day,
Holly

Wednesday, November 28, 2012

Out With The Old/In With The New


I hope everyone had a wonderful time with family and ate plenty of turkey during the Thanksgiving holiday. I can't believe that 2012 is almost gone. What a great year this has been! I have made a lot of new blogging friends and started adding my patterns to my blog.So much fun!! I have had a few people email me and ask why don't I just sell my patterns or the finished product. I love creating these patterns and because it brings me such joy I couldn't imagine selling them. I realize that during these cash strapped times not everyone has the means to purchase something fun. By offering my patterns for free I hope that everyone is able to enjoy them without the burden of paying for them (and plus I love free stuff!). As for buying the finished product, if you are interested just email me and maybe we can work out something. Right now I am not offering them on etsy, but maybe in the future :)
 
Here's a little guy that represents the almost old year- 2012. Some people refer to him as Father Time, Father Old Year, Old Man Time or Old Father Time. I like Father Old Year even though I tend to call him Father Time. I do know that Father Time carries a sickle and I couldn't let my fun little character carry such an ominous object, so he carries a banner/flag instead. The year on the banner is starting to fade and the banner is worn out/distressed and the pole is bent and warped.
 
 
The pattern for his body is the same as baby new year's (this pattern is below).
 
1. Cut all shapes out of felt except for the 2012 banner and the clock.
2. Sew body, leaving neck open and stuff.
3. Sew arms and legs, stuff.
4. Sew center seam on face and center seam on head back.
5. Using beard as a guide, place checks onto face. Use dot of glue and glue cheeks on, when dry stitch cheeks onto face.
6. Now you can glue eyes, nose and eyebrows on.
7. Stitch face front to head back, stuffing as you go. Sew shut.
8. For beard, button hole stitch raw edges that will not be stitched. Look at picture to figure out where raw edges will be. You can skip this step #8 and leave the edges raw, this looks cute too!
9. Using a very tiny amount of glue, glue beard in place.
10. Using a very tiny amount of glue, glue back hair in place.
11. Where beard and back hair touch, stitch to each other. **Be careful to not stitch Father O.Y's left side of beard down too far or it will interfere with the head placement on the shoulders (again, look at picture).
12. Sew arms and legs to body.
13. Sew one side of robe and place on body and then sew the other side.
14. You may have to clip neck on robe down a little more to get the placement of the head on shoulders correctly. Glue head on shoulders, pin to hold while glue dries.
15. Add twine as a belt.
16. Glue sandal straps onto feet, let dry. Glue sole of sandals onto bottom of feet.
17. Paint box. I tried not to add too many embellishments because the old year is fading and not much pomp and circumstance is going on. I painted a few clock with the time 11:55am and a calendar with Dec. 31st showing. I added a couple of whitish swirls and a few white dots and glitter to the top. Mod podge the whole thing. Glue F.O.Y on to the lid. *If F. O. Y moves a little after the glue is dry you may need to add a little more glue to his sandals to make him stand upright.
18. The flag is white paper with the year 2012 painted on. This allowed me to fade the year by using black, gray and then a very faint gray paint. I crumpled the flag and then inked it lightly. You could even lightly sand the banner to get it more distressed. Glued it onto thin floral wire that had distressing ink applied to it. I then bent the wire and added a black bead to the top. Glue flag to his hand.
19. The clock that F.O.Y is carrying is made from paper clay. Before the clay dries add a U shaped piece of wire for the hanger. Let it dry and then paint it. Add a piece of chain and sew to hand.
 
He is finished. A lot of pictures have him wearing a brown robe, but I thought that he looked like a monk with the brown robe. I also think he would make a great Noah as in Noah and the Ark. Hmmmm....something for the future.


Happy New Year!!! I know that it is not time yet, but it's never too early to start right?
Here's Baby New Year 2013!
Same body instructions as above. His top hat is made just like the Snowman's a couple of posts back. With one exception, he has a silver pipe cleaner instead of ribbon.

Tiny balls made out of pipe cleaner scraps decorate the box. I did use glitter on the side of the lid. I mod podged vintage silver wedding wrapping paper to the top of the lid. Add a pipe cleaner to the edge of the lid for extra sparkle.
Brand new shiny flag!
 
His diaper may look a little funny but this was what worked. Glue helps out a lot during this step. I did use some tiny black safety pins. His mouth and hair are embroidered on and his tooth is glued on.
His Happy New Year sash is made out of a 1/2" x 8" piece of felt. The words are stamped on using letter stamps and ink. This was much easier than hand stitching the words on.
His horn is made from paper with the edge painted red and fringed and the tip painted black.
Glue him to the lid. Cut a small opening in his hat to glue it to his head. Glue his horn, flag and sash on.
 He is all finished now!!
 
I hope that you add them to your list of crafts to make! Let me know if you make them, I would love to see. If you have any questions, please don't hesitate to ask :)
Have a wonderful day and keep those fingers busy!
Holly

Wednesday, November 21, 2012

Happy Thanksgiving!

Happy Thanksgiving from our family to yours!
I will be back next week with some new felties and patterns.
Have a wonderful day!
Holly

Friday, November 16, 2012

A 2 Tutorial Kind Of Day


Taking a break from decorating the house. I am so glad that DH built some shelves in the garage to hold all of the Christmas decorations. I labeled each tote by the room that the decorations belong, so I just pull a tote and go place it in that particular room. This is so much better than crawling in the "cave", it's under the stairs & sports a hobbit size door or dragging/dropping stuff out of the attic. We already have D#2's tree decorated in her room. I think that when Thanksgiving is over, I am going to be so glad that I decorated early, right now it seems a little strange.
 
I finally finished the Santa Trinket Box. He is so cute. I knew that he would be cute but I didn't think that he would turn out this well. Seeing something that you only visualized come to life is always exciting and when it turn out cuter than you expected well.....that's always the icing on the cake :)
 
If you have made any of the other trinket boxes then he is just as simple. The only different thing is that you have two colors on the arms and legs. Sew the mittens onto the arm piece and sew the "boot" onto the leg piece.
Cut out all pieces. *Just cut out one mustache. *When cutting beard piece make sure to cut and discard the area where the face will show. Be careful when cutting bangs.  I made a right and left foot with a curve to give the boots more of an boot shape. Of course just like the other figures the seam of the legs/feet will face front-zoom the picture of completed Santa if you are not sure what I am talking about.
Sew & stuff legs, arms, body and head. Place beard onto head, this is to get the placement of the cheeks, nose and eyes. Sew cheeks on and glue eyes and nose on. Glue beard on using very tiny drops of glue, this is just to hold the beard in place while you stitch it to the face. You could really just glue the cheeks and beard on, but I like the look of the stitches, it is up to you :)
 
Now, sew the hair for the back of the head on, matching it to the front hair along seam. Trim any stray corners only after you have finished sewing.
After you have attached the arms and legs to the body you can attach the head, using glue or thread.
 

His belt is about 3/8" x 5 1/2" strip of black felt. His buckle is just a piece of gold ribbon cut into a square and glued on. The fur around his ankles, wrists, neck and hat is just a pipe cleaner cut in to lengths. Measure, mark and cut.

The list is just a piece of plain paper with the names of children written with Santa's special pen. I curled the ends and distressed the edges with distressing ink.

Santa's special pen is a toothpick painted red with black accents. I painted the box red and the lid white. Ric rac and glitter decorate the lid. I love polka dots!! But am a terrible dot drawer/painter. I am not sure why I have the hardest time painting symmetrical shapes. Even when I use the end of a paint brush or the eraser of a pencil.....no circles just shapeless blobs. Lightbulb: I punched some polka dots out of plain paper and mod podged them on! Worked like a charm and I didn't have to paint multiple layers of white dots to cover up the red. Glue Santa on making sure to tape the area he will be glued to, but only if you want to glitter the lid. You can read the past posts on the trinket boxes for more in depth instructions.


Here's a picture of all the felty creations so far. I do have one more to share in a few days and I am trying to decide if I have time to make one more before Christmas!


Here's the pattern for the Boy Elf Shaker. It is basically just the same as the Girl Elf but a little bigger (head is 4 1/8" circle). He does have ears, just glue those on. And use pinking shears to cut the lower part of the trim. I used a large rusty jingle bell for his hat. If you use a rusty jingle bell make sure that you coat it with a layer of mod podge to keep all of that rust from getting everywhere.
 
 
** Use Girl Elf's collar for the Boy. As with the Girl, his buttons (gingerbread man and peppermint) are made out of paperclay.

 
Have a great day and happy crafting,
Holly

Wednesday, November 14, 2012

It's A Girl!


My goodness. I believe my schedule for the next 5 weeks is all booked up. We have school parties to do, decking the halls to finish, Thanksgiving casseroles to cook, presents to find & wrap, overdue honey does to complete, crafts to make, college kids to pick up, college kids to take back, clothes to pack, animals to board, flu shots to cry about, specials to watch, and hopefully time to chill! I have a lot more crafts planned. Maybe I can squeeze a few more into blogland before Santa comes :) 

Today I am going to give you the pattern for the Girl Elf Shaker. I realized that I have been making nothing but guy felties, i.e. Snow"man", Gingerbread "man", Rudolf (of course he's a boy), and even the little Scottie dog is a guy! So a Girl Elf was a must! I love her hat. There are little peppermints on it!

Something occured to me today. Wool felt may not be available to everyone. Regular felt from Hobby Lobby and other craft stores will work fine- just don't iron it-please don't ask me how I
 know :(  I also think the shakers would be adorable made out of scrapbooking paper. Of course you would use glue instead of thread. The patterns really don't have to be modified. To make the paper stiffer you could still use the cardboard method. I am not sure how the strips would work. I am sure, though, that you would have to cut notches in the strips every 1/4" on each side in order for the  paper to curl around the two circles correctly. I am curious now, so  in January I am going to make a few out of paper. Anyway, I hope that you enjoy the Christmas Elf (Girl) Shaker!


She is made basically the same way that the Snowmen Shakers are using the "Elizabeth method". Their pattern is here.

Supplies:
wool felt, 12" wooden dowel, paperclay, jingle bell, matchbox(aka shaker)-filled with 4 small buttons & 4 tiny jingle bells & taped shut, stuffing, embroidery floss to match, thin cardboard or poster board-cut about 1/8"-1/4" smaller that head front and head back circles 

**Cut out all felt pieces

1. Sew 5/8" x 12" strip of flesh felt to one circle. This will be your face piece. Trim strip excess.
2. Stitch cheeks on, being careful to note placement so that hair doesn't cover cheeks when hair is added later. Stitch mouth on with embroidery floss. Glue nose and eyes on. Stitch eyelashes.
3. Glue cardboard onto wrong side of face and head back felt pieces.
4. Add shaker (instructions here ) and painted dowel. Glue dowel in place.
5. Sew back of head on, stuffing after 3/4 stitched.
6. Stitch hair front to hair strip (5/8" x 12"), stopping strip just short of the curl.
7. Now, stitch hair back to strip, stopping about 1 1/2" from the end. This will help make it easier to place the hair onto the head.  Place hair onto head, finish stitching, then glue sparingly to front.
8. Cut out hat and trim. Stitch trim on. Stitch hat closed along sides. 
9. Make peppermint buttons, let dry overnight and then paint. Let dry and then cover with mod podge.
10. Glue small buttons onto hat and stitch on jingle bell. Let glue dry. Fold hat over and with a tiny drop of glue, glue in place. You can use a pin to hold it until glue dries.
11. Glue hat onto head. *Tiny drops of glue work better with this type of project. Too much glue can make a big mess. Most glue drops that I use are a no bigger than this "O" size. I also like to use a toothpick as a tiny brush to dot the glue on.
12. Add her collar, by cutting out the tiny circle & sliding it up the dowel and gluing in place. Glue big peppermint buttons on.


I used Elizabeth's clever idea of turning my desk organizer on it's back. This allows me more surface to put stuff on. It took me forever to do this, mainly because I kept on forgetting to do it, but also: where to put all of the stuff that was stored in it?

Back of their heads.

Hope you enjoy making these fun little elves. Boy Elf tutorial to come either tomorrow or in the next few days! Let me know if you make her. I would just love to see it!
Happy crafting,
Holly

Sunday, November 11, 2012

How Much Is That Doggie In The Window?

 
Don't you just love Scottie Dogs? I sure do! They are so cute. In a little town where I grew up there was a house that loved Scottie dogs. The owners had Scottie statues, planters, silhouettes and even their house number plaque had a Scottie dog on it. The house is still there, but the Scottie dogs are gone. I am not sure where they went. The house still looks the same. Neat front yard, shutters still a burnt red, Adirondack chairs still crispy white and flowerbeds maintained. That house instilled a love of Scotties in me. How charming that a pet owner would love their pet so much that they built a house theme around them. I always wondered what it looked like inside the Scottie house.
 
 I grew up, married and moved away. Now, I only saw the house a few times a year. It was during this time that I remember Christmas at Scottie dog house. They decorated heavily on the outside. A few Scottie dogs tucked here and there, but mainly a traditional theme dominated. I will visit Scottie dog house again this year at Christmas and will look hard to see if any Scotties are peeking out among the bushes. So, in honor of the Scottie dog house at Christmas I have made a fun Scottie Dog Trinket Box.
You can't tell it from this picture, but Scotty has a snowflake perfectly balanced on his nose.

I do not like this photo (it's a little harsh) but included it to show you the snowflake. It show up so well against the red.


Pattern for Christmas Scotty Dog.
 
Felt, ribbon, painted box, punched snowflake
Stitch used: buttonhole unless otherwise noted
 
Sew the two belly pieces together (this is the piece in lower left corner) along straight edge.
Now sew one of the two body pieces to the belly piece starting at neck, then front leg, belly, back leg.
Add other body piece and start stitching back leg, belly, front leg.
Stitch neck, chin, nose, snout, neck.
Stuff legs and head.
Stitch another 1/2", stuff body and stitch closed.
Glue tail, ears, eyes and then snowflake on. I used a Martha Stewart snowflake punch for my snowflake.
Add bow.


I painted the top red and added vintage ric rac. Of course mod podge the lid with ric rac on. Add holly leaves and berries.
I painted the box cream. Added vertical tan stripes, with smaller brush added three horizontal black stripes close to the top of the box and then three to the lower part of the box. I then used the same brush that I used on the tan for the red. Mod podge the box. Dry. Glue Scottie onto box lid.
 
Elizabeth at Creative Breathing has a tutorial for a cute Scottie Dog as does Jenny from allsorts.

 
Have a great rest of the Sunday afternoon!
Holly

Thursday, November 8, 2012

"Won't You Guide My Sleigh Tonight?!?"

Are you getting ready for Christmas yet? I have, mentally that is. I have been mentally placing all of my decorations merrily around the house for a few weeks now. I guess next week I will have to start decorating. We will be hosting a Sunday School Christmas party in a couple of weeks and I really don't want to leave the decorating until last minute. If I start early and I realize that I don't have enough vintagey Shiny Brites, Gurley candles, Elves, Dept 56 houses, garland, Santas, Nutcrackers, Putz houses, CDs (of course CDs aren't vintage but they play vintage music, right?), records, or any other vintagey goodness, I will still have plenty of time to order off of Etsy, Ebay or search a few antique stores before the party! Thinking ahead....

Don't you just love the old Rudolph the Red Nose Movie? It is one of my favorites. I was always fascinated by the animation. Anyway, I thought that a little reindeer in the likeness of Rudolph  was needed to add to my collection of ever growing Trinket boxes. He may be a little more time consuming than the others but he is so adorable. Making 8 black nosed reindeer and one with a red nose would be "sew" fun!


Use a 2 1/2" x 3 1//2" paper mache oval box. Paint the bottom red and the top white. You can use the icicle pattern from the Snowman Trinket box pattern (here) if you want or you can just use your pinking shears-that would be adorable too! The holly leaves and berries  are from the Snowman Shaker pattern (here). Mod podge the painted lid and box. When it is dry add another layer of Mod Podge to the top of the lid and sprinkle glitter. Let dry.
 
Print to 8 1/2"x11" sheet of paper. Or you can just blow it up to size you want on the screen and lightly trace (this is what I do when I am too lazy to run downstairs and retrieve something off the printer :)
A buttonhole stitch (2 strands of embroidery floss) is used throughout. Stem stitch the mouth.

This photo shows the gussets already sewn in place. If you are not familiar with gussets I hope these instructions will help. If you are still confused, please leave me a comment and I will try to explain better.  Take gusset piece #1 and line up "a" of gusset to "a" of body, "b" of gusset piece and line up to "b" of body and so on. Stitch on gussets. Now sew on the other side of the body- starting with the back of the neck and going toward the nose -matching the nose to nose and bottom to bottom. After you have stitched the head together stuff it. Then continue stitching, stuffing as you go along. If your gussets are too long and tend to stick out, just secretly snip them off after you have made the body. Nobody will ever know about your secret snipping.
Legs:
Stitch the legs but do not stitch the hoofs (or hooves) closed. It is not necessary to stitch them closed. Because we will be gluing Rudolph to the lid of the box. Lightly stuff legs. Glue legs to body.
Ears:
After cutting the ears out of felt, add a little bit of white paint on the inside.. The pattern piece shows where the white will go. Paint with a light hand. If you mess up, you can always cut another ear :)
I like to pinch the ear bottom and take a few tiny stitches. This will help the ear to "cup" a little. Now you can just glue the ears on.
 
 
Antlers:
Cut out antlers from a darker brown than the body and glue between ears. Look at photo for placement.
Eyes:
Cut out eyeball from white felt. Now for the center of the eye (the black part) I used the same pattern and cut out the teardrop shape and then trimmed this shape to make the iris. Glue in place and then glue on head.
Mouth:
Using two strands of back embroidery floss, stem stitch a mouth. I didn't draw this on the pattern but you should be able to "eyeball" the mouth easily.

 
Nose:
Tiny purchased pom pom. Glue in place.
Tail:
Sew two tail pieces together. Glue on.
Jingle Bell collar:
Small piece of red ribbon with tiny jingle bells sewn on. You could also glue bells on. Glue one end of collar onto back of neck. Pin and let dry. Bring other end around and glue it in place.


Placement of facial features.
 
 
Finish:
Glue on: felt icicles, Rudolph and holly leaves and berries.


The Whole Jolly Gang. Don't you just love Elizabeth's little reindeer. He's beyond adorable!
 
Hope you enjoyed this fun tutorial! Let me know if you make any of the Trinket Boxes. I would love to see them!
Have an awesome and crafty night!
Holly