Wednesday, October 31, 2012

Sew Much Fun Snowman!


Bat costume made: check
candy in treat bags for treaters: check
plastic trick or treat pumpkin found: check
leaves swept off porch: check
puppy's costume found: check
husband instructions given: check
pumpkin carved: not check
Well....the list is almost completed.
 Pumpkin butchering this afternoon:
time: 4ish
place: kitchen floor (too cold outside)
rsvp: regrets only- if you don't have the stomach for it


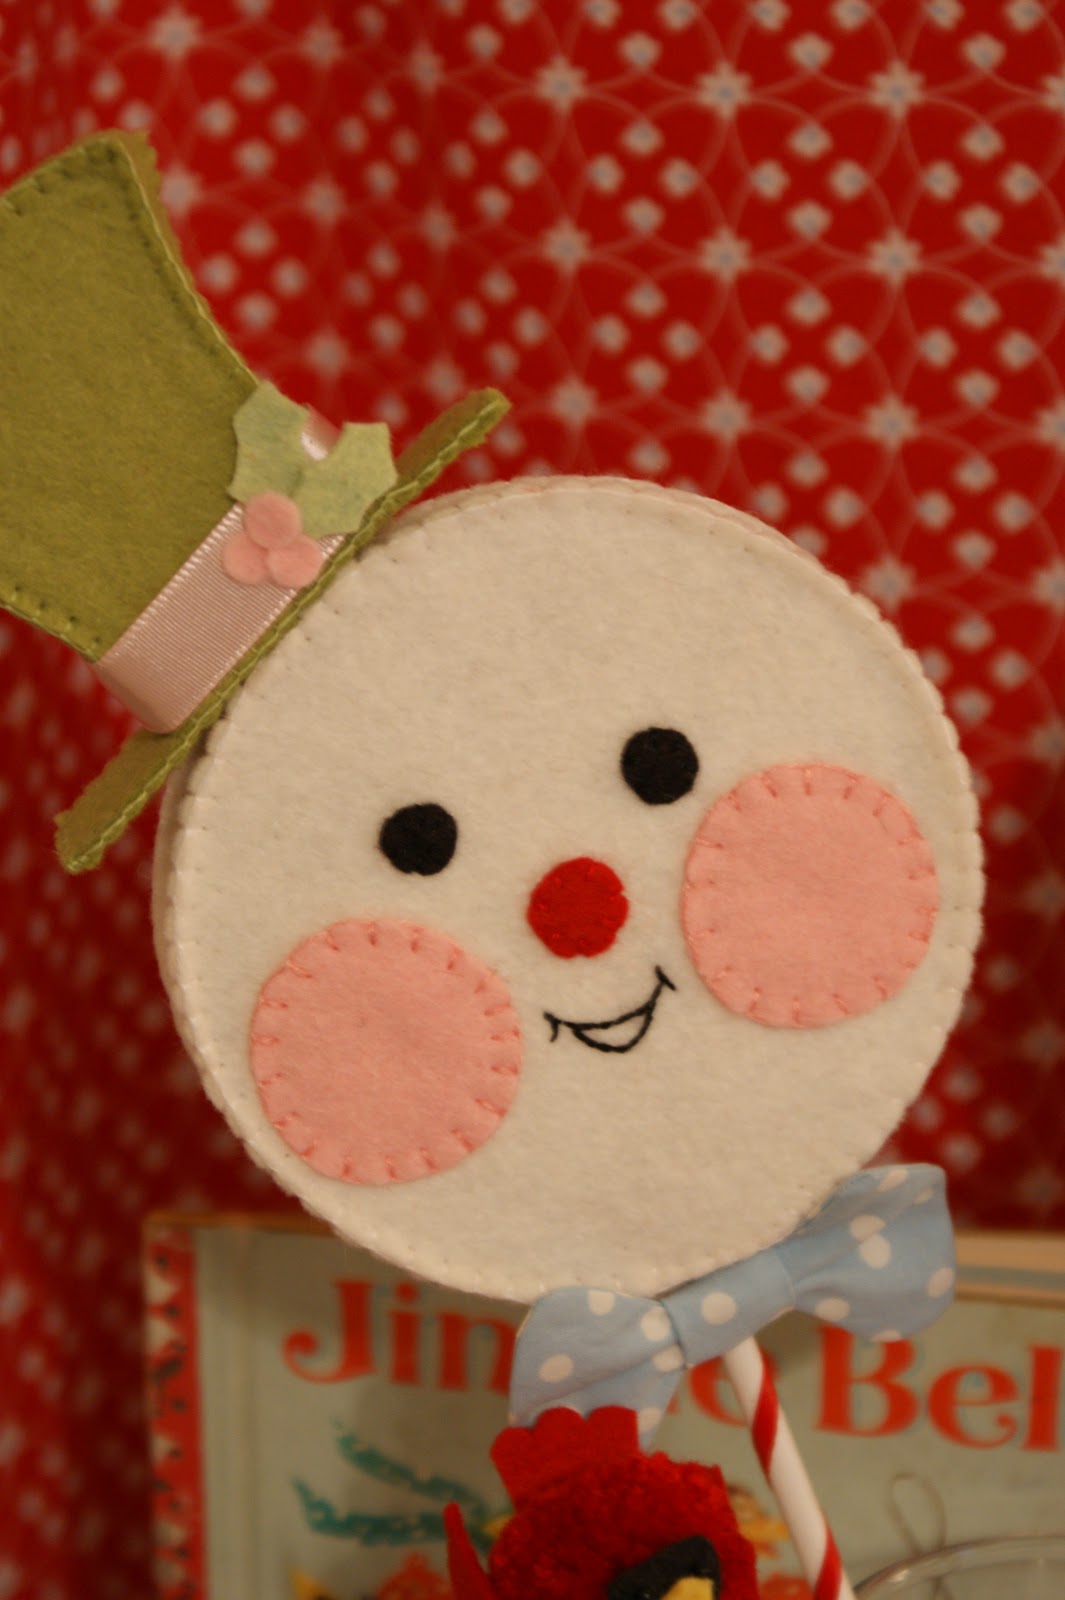
Today I have a sweet little tutorial for you. He may look a little complicated but if you can sew a buttonhole stitch, cut with scissors and thread a needle. He's easy peasy.

He is about 4 3/4" w/o his hat.

Print on 8 1/2" x 11" sheet of copy paper. 


Supplies:
white, red, black,, pink and green felt (wool felt is the best but regular felt will do too)
embroidery floss-white, black, pink
stuffing
paper mache trinket box (from Hobby lobby- I used 3"tall x 3" wide round box)*top painted white and bottom painted red, inside and out. Coated with one layer of mod podge.
clear glitter
mod podge
glue (I use Aleene's tacky glue)
paper clay


Print pattern and cut out. Cut felt shapes out. Take care when cutting icicles (I must apologize for misspelling icicles on the pattern-I meant to look it up and double check, I promise, I really did-but the excitement of the cute font side tracked me and I forgot). Anyway, you can cut the icicles with points instead of rounded end. Cutting sharp points and using tiny scissors will make cutting easier.


1. For face: Sew two front pieces together, straight edge to straight edge. Now sew on cheeks, then glue eyes (black felt cut out with hole punch that makes tiny punches) and nose on. Draw mouth on with disappearing pen. Stitch mouth with one strand of black embroidery floss using stem stitch. 
2. For back of head: Sew two back pieces together, straight edge to straight edge. Sew front piece to back piece, stuffing as you go.
3. For body: Sew front pieces together (straight edge to straight edge) and then back pieces (straight edge to straight edge). Now, sew front and back together. Stuff and leave neck open-do not sew closed.
4. Sew arm pieces together. Stuff.
5. The legs are sewn with gusset pieces first. Pattern shows placement. If you have any questions about this step just leave a comment and I will explain in better detail. Stuff.
6. Sew arms and legs to body.
7. Sew head to body. Don't worry if stitches show, scarf will cover them up.
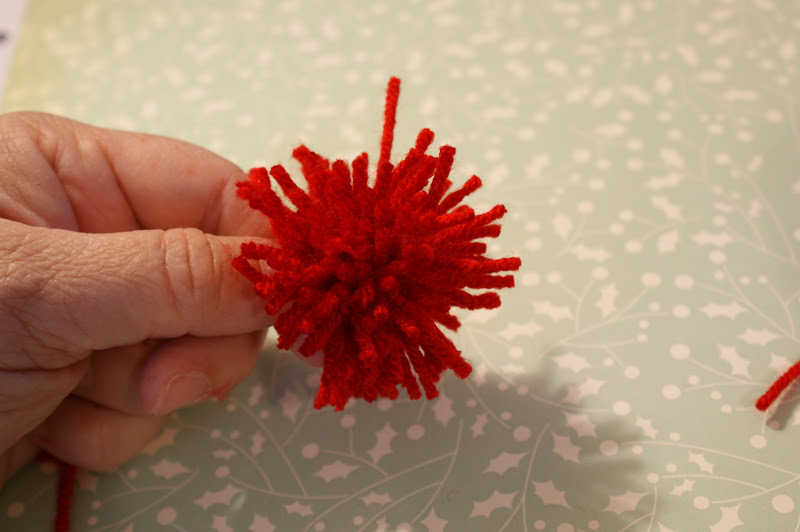
8. Make buttons from paper clay and paint to look like a peppermint. Add one layer of mod podge and glue on snowman.
9. Place snowman on top of trinket box top. Mark placement with pencil and using a tiny piece of tape about 1/4" x 1/4" place on top of pencil markings. Paint mod podge on the white top and then glitter. Shake off excess glitter and let dry. Gently use a pin to help pick tape off.
10. Glue icicles to box top edges. Now glue snowman on.
--------------------------------------------------------------------------- 
*scarf is just a piece of wool felt. Hat is one 3/4" circle, one 1 3/8" circle and 2 3/4" x 1" piece of rectangle wool felt, stuffed lightly. Two freehand holly leaves with snippets of red felt to represent holly berries are glued to hat.
---------------------------------------------------------------------------
Snowman Trinket Box is now finished! If you have any questions, just shoot me an email or leave a comment. Enjoy!

Here's the pattern for the snowman. 


ps. These would make cute teacher gifts with a gift card tucked inside :)
 ---------------------------------------------------------------------------
Have fun and stay crafty,
Holly 

Saturday, October 27, 2012

Clanky, Clanky, Chink


This morning DH, D#2 and I went antiquing and Christmas browsing. Well....actually I went antiquing and D#2 came along because I promised to take her to the wonderful Peppermint Forest and DH came along to get lunch (and to drive b/c I hate driving in town!!). The antique store is called The Sleepy Poet. I am not sure how many vendors they have but it must be over 100. I found one sweet booth that was almost like a yard sale. Her prices were very good. Here is what I bought. Notice all of the "unreplaceables" aka glassware/ceramics.


 DHubby was in charge of the buggy and let's just say the store's floors were cobblestoned. Whenever D#2 and I lost hubby all we had to do was be quiet and listen for clanky, clanky, chink and we knew right where he was. I must remember to bring some jingle bells and tie them to the buggy so we will never lose him in any store, ever! In his most awesome practical mind he thinks if I am not near a buggy the less I buy b/c who in their right mind wants to shop with their arms full of unreplaceables, books, cookie cutters, large fisher price castle, keeping up w/ D#2 and chase after a buggy!?!?  And on an empty stomach!?!? *snort* doesn't work.

I have created these cute little Christmas Snowmen Shakers. They were so fun to make and when shaken they "jingle".


The Snowman on the left has a different mouth than the pattern.

Supplies:
~felt in assorted colors
~jingle bells (tiny, about the size of an English pea, you will need about 8)
~12" wooden dowel painted * I spiraled a ribbon down one and painted the other then put glitter on it)
~ribbon for the hat band
~poster board or light weight cardboard (from cereal/snack boxes)
~scrap of fabric for bow tie
~stuffing


 1. cut out all pattern pieces
2. cut out all felt pieces *note to cut out 2 face, hat and hat brim pieces
3. Using the pattern for face, hat and hat brim cut out 2 of each out of cardboard about 1/4" smaller, hat brim requires only one cardboard cutout.
4. Stitch cheeks, nose and eyes to face. A tiny drop of glue will help keep pieces from shifting while you sew. Using buttonhole stitch on nose and cheeks and tack stitch for eyes. Draw mouth on with a disappearing pen. Stem stitch mouth.

4. Sew white strip (3/4" x 12 1/2") to face.
5. To reinforce face and back of head cut out 2 cardboard pieces about 1/4" smaller than pattern. Do the same for hat but only one piece for hat brim.
6. After sewing white side strip to face apply small amount of glue to cardboard piece using brush spread thinly. *Please take care that the plain side not colored side (with all of the wording) is glued to the back of the face. You do not want "Cheez-its" showing through on Snowman's face. Glue cardboard onto back piece.

7. Fill match box with jingle bells. Follow instructions for adhering box and inserting dowel step here.
8. Stitch back on, stuffing as you go.

Hat

1. Glue cardboard pieces to back of front and back piece. Let dry.
2. Glue sandwich for brim: bottom brim, cardboard piece (cut 1/4" smaller than pattern), top brim. Let dry.
3. Stitch hat front and side strip (3/4" x 8") together. Then stitch on hat back.
4. Lightly stuff.
5. Stitch hat top to brim, using buttonhole stitch. You will match up the long sides of the hat top to the long sides of the hat brim, making sure to center. This stitching will keep the hat top tightly on the brim, so it is not necessary to worry about stitching the short side of the hat top. *If this is confusing please let me know in the comment section and I can upload a picture :) 
6. Glue ribbon to hat. Glue on holly leaves and berries.
7. Add scarf or bow tie.
8. Now you can add glitter to dowel. I also like to apply mod podge to my ribbon spiraled dowel. This keeps the ribbon from unraveling.
--------

------
Print size should be set at 8 1/2" x 11". It should fit a whole sheet of copy paper.


Above: I use a tiny hole punch to punch out holly berries. Since I use a wool blend felt the cut is pretty sharp but sometimes sharp tiny scissors are needed to help out. The long doll need is a wonderful tool for picking up the tiny berries to adding glue to places. I love this useful needle!

Hope you enjoy this tutorial and if it is as clear as mud, just email me and I will try to explain better. Have a wonderful, crafting weekend,
Holly

Thursday, October 25, 2012

Christmas Cardinal and the Candy Cane

 
I know that it is a little early to start on Christmas crafts.... but,  if you don't start now chances are you won't have enough time come December. I have made this cute little pom Cardinal. He is very simple and you could make him into any bird: yellow for canary, blue for bluebird or jay, gray for mockingbird, etc. He would also look adorable on presents. You could add a small gold thread loop to make a hanger for him to be an ornament. Have fun! 
 
Supplies: Red yarn
red, yellow, black felt
scissors
red and white pipe cleaners twisted together
tiny black beads, I used the heads of applique pins painted black.
Patterns for felt pieces. Felt needled: red, black and yellow.


Since this bird is tiny, I used old school way. I wrapped the yarn around my fingers about 45 times.

Gently remove wrapped yarn from fingers and tie it in the middle with an 8" piece of yarn. *Tie it tight!

Now snip all of the loops. The long piece of yarn that you used as a tie makes a good handle to hold the pom while you snip.

Now it looks like this. Crazy hair bird! He needs a little trim.


Still holding long tie tails, start trimming your pom. The closer you trim to the center the tighter and more compacted your pom will look. Go ahead and trim, it is not as hard as it seems! It is quite fun. Now you just need to glue tail on first (this makes placement of the wings and face easier), then wings, face, beak then beads. Glue Cardinal to pipe cleaner, which has been twisted into Candy Cane shape. You're finished!!


Wouldn't he look adorable on a real Candy Cane to give as a gift? The wheels of craftiness are turning now!
Have a wonderful and blessed day!
Holly

Monday, October 22, 2012

Falling Leaves

 
Yesterday I made some fabric leaves for a small swag. I had purchased a swag but just wasn't happy with it. It actually looks better in the photo than in real life. The pumpkin looked really fake and the acorns were purplish blue (not shown). I have some wonderful Jo Morton fabrics that I had been saving and knew that this was the project for them.
 
Fakey pumpkin and yucky leaves.
 
 
Above: Pattern for leaves. You could really make these out of any color fabric or felt. How about some red or aqua or even bright yellow leaves or even some with a 30s flair. Cute!
 
Supplies:
Fabric of your choice
6" painted brown floral wire* see note
double stick fusible web
(double stick kind-just means you can iron two fabric pieces together-I get mine at Hobby Lobby. Amazon sells it too if you can't find it locally. Any fabric shop will carry it.)
Sharp scissors
 
1. After you cut out leaf patterns, lay the pattern on fabric and cut out two rough square for each leaf (ex. the leaf in bottom left corner requires two 4x5" squares and same size fusible web).
2. Layer the four pieces together, fabric, fusible web, fabric and pattern on top. Now carefully trim the bottom of the leaf to all layers. This will help with placement of the wire.
3. Make a sandwich: fabric, fusible web, wire-4" sticking out & 2" inside, fabric
4. Now iron the sandwich together for about 10 seconds. If you forget the wire after you have fused the pieces together don't worry, warm the fabric for about 5 seconds and the glue will remelt and you can lift the bottom of the leaf and insert the wire-just iron closed and let cool.
5. Lay the pattern piece on top taking care to line up the bottom of the pattern to bottom of the trimmed fabric.
6. Carefully cut your leaf out. You can crinkle the leaf to get a more realistic look.
 
*If you don't have white wrapped floral wire, you can make some. Wrap a pipe cleaner or plain wire with masking tape and paint desired color. I painted my brown. The pipe cleaners will be a little thicker than plain wire, but that is ok.
**If you don't have fusible web or can't find any, I think mod podge would work wonderfully. It might be a little messier but put some wax paper down and clean up will be a breeze!


Trim bottom of leaf pattern (before fusing pieces together) to make placement of wire easier.

Trimmed fabric(bottom layer) and wire in place. Now add trimmed fusible web and trimmed top fabric piece. Notice that my wire is white, I forgot to paint it before I started. Sorry for that ugly water stain from the iron. Didn't notice it while I was doing this project. Time for a wash!

The whole sandwich ironed.

Above: I pinned my pattern in place to make cutting out the leaf easier. Sharp pointy scissors are a must!

Above: All my leaves.


My velvet pumpkin with real pumpkin stem. Acorns are needle felted with real acorn caps. Tiny gourd on the right was part of the original arrangement. Learn how to make pumpkin here.


Above: My dressed up antique wooden hay fork. The tiny quilt is my take on a quilt from Primitive Quilts magazine called Country Days. I finished and quilted this in three days! Whew! That was a marathon, but if I didn't get it done I wouldn't be able to enjoy it this Fall, because it would have ended up in my UFO (un-finished objects) box. I pieced the whole quilt on my antique Featherweight. This is the first project that I have made on the little fw. I found that I was very accurate on this quilt and all but two or three points lined up beautifully. Using the rotary cutter for this small project just doesn't work. I used the old fashion way. I made two paper templates (the quilt only uses two squares!) and traced them on the fabric with a permanent, yes permanent pen and then cut all those squares out with scissors. The thin line on the permanent pen is much more accurate than the disappearing pen tip. This is why I was able to finish in three days. Usually I spend hours ripping out lopped off points trying to make them reappear. Maybe I shouldn't fixate on such small details but I can't help it.
Hope you have a wonderful day and get crafty and finish some UFOs!!
Holly

Saturday, October 20, 2012

A Rose By Any Other Name........

This week flew by so fast! D#1 was home from college on Fall break. We had a wonderful time. She and I hit some antique stores and scored! D#1 found some 1940s opera glasses that caught her eye and only paid $5 for them. She was so excited, now she could actually see what was going on down on the football field. D#1 and her friends love going to the college football games. Wish I had taken a picture of them-so cute. I bought a Hoosier table for my typewriter and a wonderful 1950s kitchen chair that I am going to eventually paint red.
 
I have an easy tutorial for you today. The sweet little felt roses that look so adorable on anything. They could even be made out of paper. I haven't tried that yet but I don't see why you couldn't make them out of paper and use glue instead of needle and thread. 
 
Felt Roses


Draw a circle with about a 1" radius (or 2" in diamete)r. I used my compass but you could use anything about the same size. Of course if your circle is bigger it will make a bigger rose and if it is smaller it will make a smaller rose. Cut out the paper circle and use it as a template to cut out the felt circle.

Draw a swirl on the paper. Making sure to taper as you go inwards toward the middle. The middle needs to be a tiny circle-see picture.
 

Start rolling the circle from the middle. After you have rolled a little, take needle and thread and make a few stitches from one side to the other.


This is what the front looks like so far.


The back will pucker a little as you stitch. This is fine, because this pucker gives the flower it's shape. After you have tied off, add the bead to the center and tie off again.
 

 Finished. Add a felt leaf or paper leaf like I did using glue.
 
Hope you enjoy this sweet little rose. You can now make hundreds in lots of different colors!
Have a wonderful weekend and keep your little crafty fingers busy!!
Holly


Tuesday, October 9, 2012

No Sense At All

This is a true story that actually happened last night.

Dear sweet teenage son: "Hey, Mom. I need to go to buy me some more socks and underware tonight. I don't have any."

Me (level headed mom trying to teach son domestic skills) "Well....it's late. Just bring your stuff downstairs and wash it."

Dear sweet teenage son: "That makes no sense!"
Yeah....no sense at all.

Saturday, October 6, 2012

Five Little Pumpkins!

I can tell the air is getting a little cooler and dryer, just ask my skin. That's the only thing that I do not like about cooler weather-dry skin. I have to practically bathe in lotion. Anyway, I just adore Gooseberry Patch. Don't you? Look at their calendar picture for October. Isn't it just adorable. I love the porch. I might just have to make that cute little pumpkin in the left corner. Paperclay? We'll see. It has been forever since I made some type of Acorn Squash (see the little recipe below). After the Squmpkin incident I am not too sure Son is going to try Acorn Squash anything. He did love it when he was little maybe -I should just tell him that and convince him to eat it.

I finally finished my cotton spun Fally/Halloween doll. She could also be an ornament. I did not glue her to the base. It is more like a stand. Her arms, body, legs, hat are made from cotton. Her skirt and collar are crepe paper. The tiny trick or treat pumpkin and orange balls are made from paperclay. Her face is made from a mold that I made and hand painted by me. She is so sweet in person. I recently started making cotton spun ornaments again. I found my makedo cotton spun kit that I put together years ago buried in my craft closet. This past summer when I cleaned out my closet I found it! What fun! To completely forget about this adorable craft is crazy. I wasn't really crazy about the previous dolls that I had made so I guess that is why I hid the box in the closet. I made quite a few adjustments and now just love how they are turning out. Mainly it was the face. I just wasn't pleased with how it looked, so that is when I decided to make my own. Also the body was reworked and now I really like this body better. I have experimented with a few other things, some of which I haven't liked. This is why it is taking me a while to post pictures. I can't wait to start on some Christmas dolls/ornaments. Wouldn't they look so cute tied onto a present?


I made 5 little pumpkins sitting on a gate. Well....not all of them sitting on the gate, but two are. Don't you just love that poem? Five Little Pumpkins. Ever since D#1 recited it in kindergarten (she is now in college), I have loved it. It makes me think of my childhood and how we use to recite little poems like this.

Five little pumpkins sitting on a gate,
The first one said, "Oh my, it's getting late."
The second one said, "But we don't care."
The third one said, "I see bats in the air."
The fourth one said, "Let's run, and run, and run."
The fifth one said, "Get ready for some fun."
Then ooooooo went the wind, and out went the lights, And five little pumpkins rolled out of sight!

These little pumpkins are made out of paperclay-like I said before, I love that stuff! I am headed over to my other blog Prims n' Pins to post about the Fall decorations in my house.
Have a great rest of the day and keep your little fingers crafty happy,
Holly

Monday, October 1, 2012

Happy Little Monster Hiding Under My Bed!


Well....not really under my bed, but more on that later!

I finally got through this past week and weekend. D#2's birthday party was a lot of fun. The children were so sweet and well behaved. We had 6 girls and 1 boy. I think that the little boy didn't know what to make of 6 giggly & screaming girls. He was very quiet. I included him in everything and he really had a great time. We played Hot Potato (side story: when Son was in 2nd grade, we had a party at home for him with about 8 of his friends. We played Hot Potato with a real, hot potato! I thought that I was being so brilliant by using a real potato and warming it up in the microwave for about 2 minutes. I bet nobody at Son's party had ever played a game with a real potato. Half way though the first round, the still warm potato started to come apart! At the next child the potato totally disintegrated! Uggg....what a mess. As I looked on with horror/embarrassment, one sweet, bless his heart child looked at me and asked if he could eat it.....It was time for cake!) lesson learned-we used a mini Christmas Elf, Story Cubes & Musical Pillows. We also painted Christmas cookies while we listened to Christmas music. If you can't tell now....our theme was Christmas Slumber Party. Sweet D#2 wanted everyone to wear their pajamas and I added in painting cookies because it is so fun and makes a great "goody bag" gift. I used the Christmas theme because it is an easy theme. At the very end we watched Mickey's Once Upon a Christmas and ate popcorn made on the stove! Fun times indeed!

I did get a little craft ready. I hope that he inspires you to try your hand at making something crafty. He is a Little Monster based on a cup D#2 drinks out of. This is my take on the image. The word "Boo!" is made out of paperclay to look like bones. Dried overnight, painted white and then antiqued with water pigmented with a little bit of brown paint-just enough to give it a light wash. While wash is still wet wipe off gently. Paperclay is not very forgiving when water touches it, so be careful.
Happy Little Monster is only 4" tall!

I did add a little matchbox (altered to make smaller) filled with about 3 broken toothpicks. When shake gently, the little toothpicks sound like bones rattling :)


The swirly part of his eye is embroidered. The dot on his other eye is a little seed bead. Pipecleaners twisted together make the "pole" of his boo sign.

Pattern for you!

 The monster on the left is to show placement. The one on the right is the pattern. The ears and arms are only one dimensional. I put a tiny drop of glue in the dotted areas and then placed them on the wrong side. I did cut the mouth out (see pic below), add teeth (dot glue in place-you will eventually sew them on when you buttonhole stitch the mouth)
and put a piece of red felt (a little bit bigger than the cut out mouth-of course dot glue, let dry. Sew eyes on. Buttonhole stitch side strip to front piece, making sure that you include the ears and arms in the stitching. Now stitch on the back stitching 3/4 of the way. Stuff the feet and legs only. Now is the time to add the shaker if you made one. Stuffing the rest of the body, stitching closed. Basically it is just like the pumpkin shakers several posts ago.
View from above. He is sitting on a spool of ribbon. Circles were cut out of Halloween themed paper and glued to the spool. Happy Little Monster was also glued to the spool. The pipecleaners are glued
to his sides. Pinning them in place while they glue will help them stay put.
 t

I am having so much fun making pumpkins and things out of paperclay. The only problem I have with it though, is that it dries out too fast. I have always used polymer clay but I am loving the paperclay. It's texture is so much more vintage looking.

I hope that Happy Little Monster makes you want to get your fingers busy and make something!
Have a wonderful night and Happy Crafting!
Holly