Saturday, July 20, 2013

Boo!


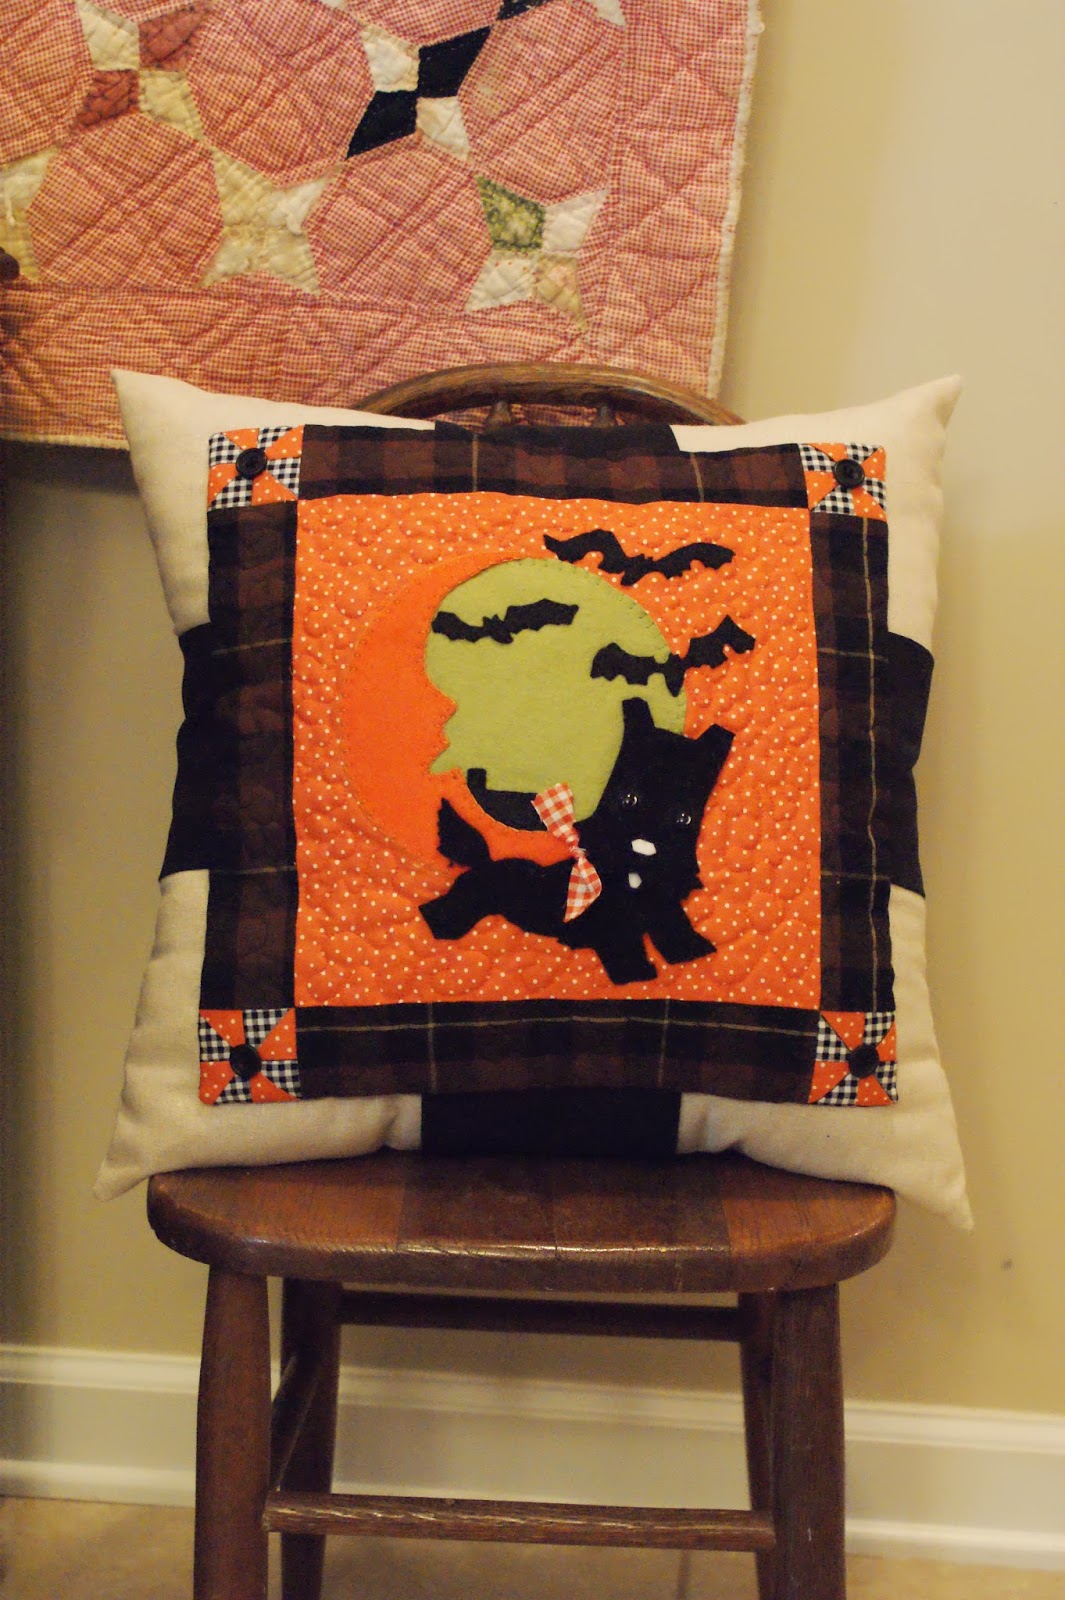
I can't believe that July is almost over! Like most of the US, we are hot here. Thunderstorms just about every afternoon does cool things down a bit. Right now I have Fall on the brain. A while ago I pinned this cute vintage postcard. What personality that little dog has! I really wanted to make him into something. Maybe an embroidery? Or how about a little stuffed animal? But the bats and moon are just so fun that I just couldn't make him alone. I decided to make a mini quilt and turn it into a pillow. Don't let the word quilt scare you. The moon, bats and puppy are appliqued on, so it's easy peasy! And with my pattern you could easily make it an embroidery project. Just  cut the pattern pieces out, assembly it with glue and then make a photo copy. This will be your embroidery template. You can now trace it onto fabric using a light box. Before I purchased my light box, I use to use a clear Rubbermaid box with a lamp underneath. It worked like a charm, just be careful and don't get burned.
 
Supplies needed:
Felt
Orange fabric- 10" square
Black fabric #1- 15" square
Batting 15" square
Plaid homespun-fat quarter
Scraps of black and white gingham and orange fabric for pinwheels
4 black buttons
Osnaburg- cut two- 20" square pieces for the pillow
Black fabric- cut two- 10" x 34" pieces
Misc: needle, matching threads, scrap of gingham ribbon, eyes, freezer paper, tacky glue
**Pattern links are at the bottom of the post.

Cut out all pattern pieces. Trace all bat patterns and all puppy patterns onto a small section of freezer paper (on dull side). Do not cut out pieces until you have ironed them onto the black felt. I like to use this freezer paper method to cut felt out. Since the paper gives you a more stable background the tiny details are easier to cut out. The freezer paper is not permanent and will easily peel off. You could also use fusible web. Big plus, fusible web would eliminate the need to stitch the felt pieces on.  Cut out all felt pieces. This includes: moon, green area behind moon, bats, house and all puppy pieces.  Set them aside.

Make the pillow, set aside.

Quilt
Make 4 pinwheels. I like Lori Holt's method found here. Her method uses 4" squares, for these pinwheels use 3" squares. 
Using the homespun fabric, cut 4 strips 2 1/2" x 10". Stitch one strip to the top and one strip to the bottom. Iron.

Now you will need to add the pinwheels to the side strips. This is where accuracy comes in handy. Add one pinwheel to the top of one of the side strips and then to the bottom of the same strip. Do the this for the other strip too. Now stitch the strips to the sides of the orange fabric being careful to line everything up. 

Pin the batting to the wrong side of the orange fabric. I quilted using a stippling pattern. I stitched in the ditch for the pinwheels. 
Trim the batting.
Now, with right sides together sew the 15" black square to the orange fabric, leaving a 3" gap for turning. After stitching all the way around, carefully trim excess fabric and clip the corner points off. Turn. Iron. Slip stitch opening closed.

Now it is time to add the felt appliques. I used a buttonhole stitch for the moon and green background. I "stay stitched" the bats and puppy on. Gluing his nose and tongue on are much easier than stitching. After everything is stitched down, glue his bow on.

Inspiration card!

To add the side pieces, fold 10" x 34" strips in half and stitch. Turn right side out and iron. 
Raw edges are hidden under the mini quilt. You could applique something on this side as well. Maybe a pumpkin? Or full moon? How about a scaredy cat?

After you have added the side panels, stitch the mini quilt on using a slip stitch. 


                                             Pattern #1 is here. Pattern #2 is here.


Hope that you have a boo-tiful weekend!
Holly


Monday, July 8, 2013

Look! It's A Flip Doll!


Sometimes life will hand you lemons and when it does, do something that makes your heart leap for joy! I have always loved the topsy turvy dolls. They do make my heart skip a beat and not to mention, I have always wanted one. Two dolls in one. What could be better!! When we were little, my sister had a crochet topsy turvy doll. One side was a princess and the other side was a frog. It was so cute. 
One is a bunny and the other is.....


a lamb. One likes cake and the other likes tea.


(Above) Bunny has a cute little pink nose. Her eyes are 10mm safety eyes with the stem broken off. Trim a little bit of the fur where the eyes are going to be placed and then glue the eyes on. If you are making it for a child, please use the safety stem and disk. Just add the eyes before you stitch the bodies together. 

Click here to download the pattern #1.  And here to download pattern #2.  Just click on the word "here" and it should take you right to the patterns.

(Above photo) ***Useful hint. Use the trace and sew method on this type of fake fur. I like to trace it with a permanent marker, sew and then cut it out. Sometimes I will lay the pattern down and just sew around the pattern. If you have any questions, please don't hesitate to ask.

(Above) Before stitching, cut off any excess fabric. Now is the time to add any decorative trims. Then stitch the tops together first (above photo) and then carefully matching the bottom edges together -stitch. 

(Above) When stitching the skirt together, use pins and sew very slowly. This will help to avoid puckers. Add seam binding (or bias tape) to the raw edges of the skirt. Use three strand of embroidery floss to make a running stitch around the top of the skirt. Put the skirt on the doll and tighten it around the waist, tie off. 

(Above) Add a ribbon to the middle to cover up the gathered skirt on each side of the doll. Carefully stitch the top of the ribbon right above the top of the gather. Carefully stitch the bottom of the ribbon to right below the gather. Try to smooth it as much as possible while you stitch. If you feel like the ribbon is show to much bulk underneath, you could always use a piece of fabric instead. 

For the top:
For each dress top, fold the top edge over 1/4" and stitch. Join the bottoms of the dress tops together using the sewing machine. Now fold the sides over 1/4" and stitch. I used the buttonhole stitch on my machine to make the arm holes. You could just as easily cut the holes and use the zig zag stitch. You might want to measure the widest part of the arm before stitching the arm hole just to make sure that it is long enough for the arm to fit through. Place the dress top on the dolls and add a few stitches to the back (kind of where buttons might go), this will keep the dress top closed.

For the collar:
Cut two collars out of coordinating felt. Using tiny drops of glue, glue the front of the collar where the bow is going to go.
For the lamb, I did something a little different for the nose. I opted to cut a small circle out of felt and stitch a nose and mouth. I wasn't happy with the way the felt nose looked on the lamb. I felt like she looked too much like a bunny. I did add blush to the lamb and bunny's cheeks and a little above the lamb's nose. If you look closely, I also added whiskers to the bunny (embroidery floss). Add bows to ears and front of collar. 

This doll was so much fun that I am sure more topsy turvy dolls (aka flip dolls, as D#2 likes to call her (them)) are in my future! What about a pumpkin/bat or flower/caterpillar? The possibilities are endless!


Four more blocks for the Quilty Barn Along Quilt (Lori Holt). In my favorite colors! The red is actually the fabric that I used for my craftroom curtains. When I finish this quilt, it is going to hang in the kitchen! Now I just have to built the barns around them.

I hope that each one of you has a wonderful topsy turvy night, 
Holly

Thursday, July 4, 2013

Happy 4th of July!


Have a safe and happy 4th of July! 

"While we are zealously performing the duties of good citizens and soldiers, we certainly ought not to be inattentive to the higher duties of religion. To the distinguished character of Patriot, it should be our highest glory to add the more distinguished character of Christian." 
 President George Washington (1st US President)