Showing posts with label shaker. Show all posts

Saturday, June 29, 2013

Let Freedom Ring!


I worked really hard yesterday to try and finish the Uncle Sam shaker. Whew....it's finished :) Just in time. You could easily make him in one day. Cut him out now and glue the cardboard pieces on and then tonight while you watch t.v. you can hand stitch him together.  


A very patriotic looking table.


I have been meaning to make some stands for the shakers for a while now. This way you could display them without worrying about the vase. They do tend to flip around in the vase and expose their back. Floral foam works great in the vase too. Just cover the foam with some type of filler: Easter eggs, Christmas lights, plastic grass, etc.
I painted a wooden plaque from Hobby Lobby (.50) blue. Sanded it to get it a little distressed looking. Rubbed a thin layer of Distress Ink (aka scrapbook ink-I love this stuff. It is what I use to make my paper look old and vintagey. I bought it from H.L. on sale. It is the Tim Holtz Distress Ink-vintage photo. ) I downloaded some sheet music, Star Spangled Banner of course. Printed it, cut a circle out, distress it and then mod podged it on. I also painted a layer of mod podge on the whole stand including the shaker rod. Drill a hole in the middle after the mod podge dries and stick the shaker in the hole.


Here is the back. Notice that I glued white cardstock onto the back of Uncle Sam's "shirt". I did the same to the back of the banner. Use the Elizabeth method to construct the head.
-----------------------------------------------------------------------------------------------------------


-----------------------------------------------------------------------------------------------------------------------


---------------------------------------------------------------------------------------------------------------


---------------------------------------------------------------------------------------------------------------------

I will also show how to make this banner on my other blog: Prims 'n Pins. If you have any questions, please don't hesitate to ask.
Have a wonderful 4th,
Holly

Wednesday, June 26, 2013

With Liberty and Justice For All.....

I can't believe that July is almost here! Boy, am I behind on my decorations. I had planned to make  a lot of 4th of July things, but time just slipped away. I still plan on making them but will be posting them after the 4th :)
Anyway, here's a fun little shaker. Meet Liberty, the American Bald Eagle. He is so simple to make. If you have made one of my shakers before, he is just like them except the face piece is glued onto the shaker body.

The USA banner is just card stock, old dictionary pages (thanks Tammy!), silver pipe cleaners(twisted into tiny circles), blue stars, vintage tiny blue ric-rac and jute. I used bamboo skewers painted white and little wooden ball on top for the banner holders. I thought these "holders" looked like drum sticks. Would he be cute holding a vintage looking drum?


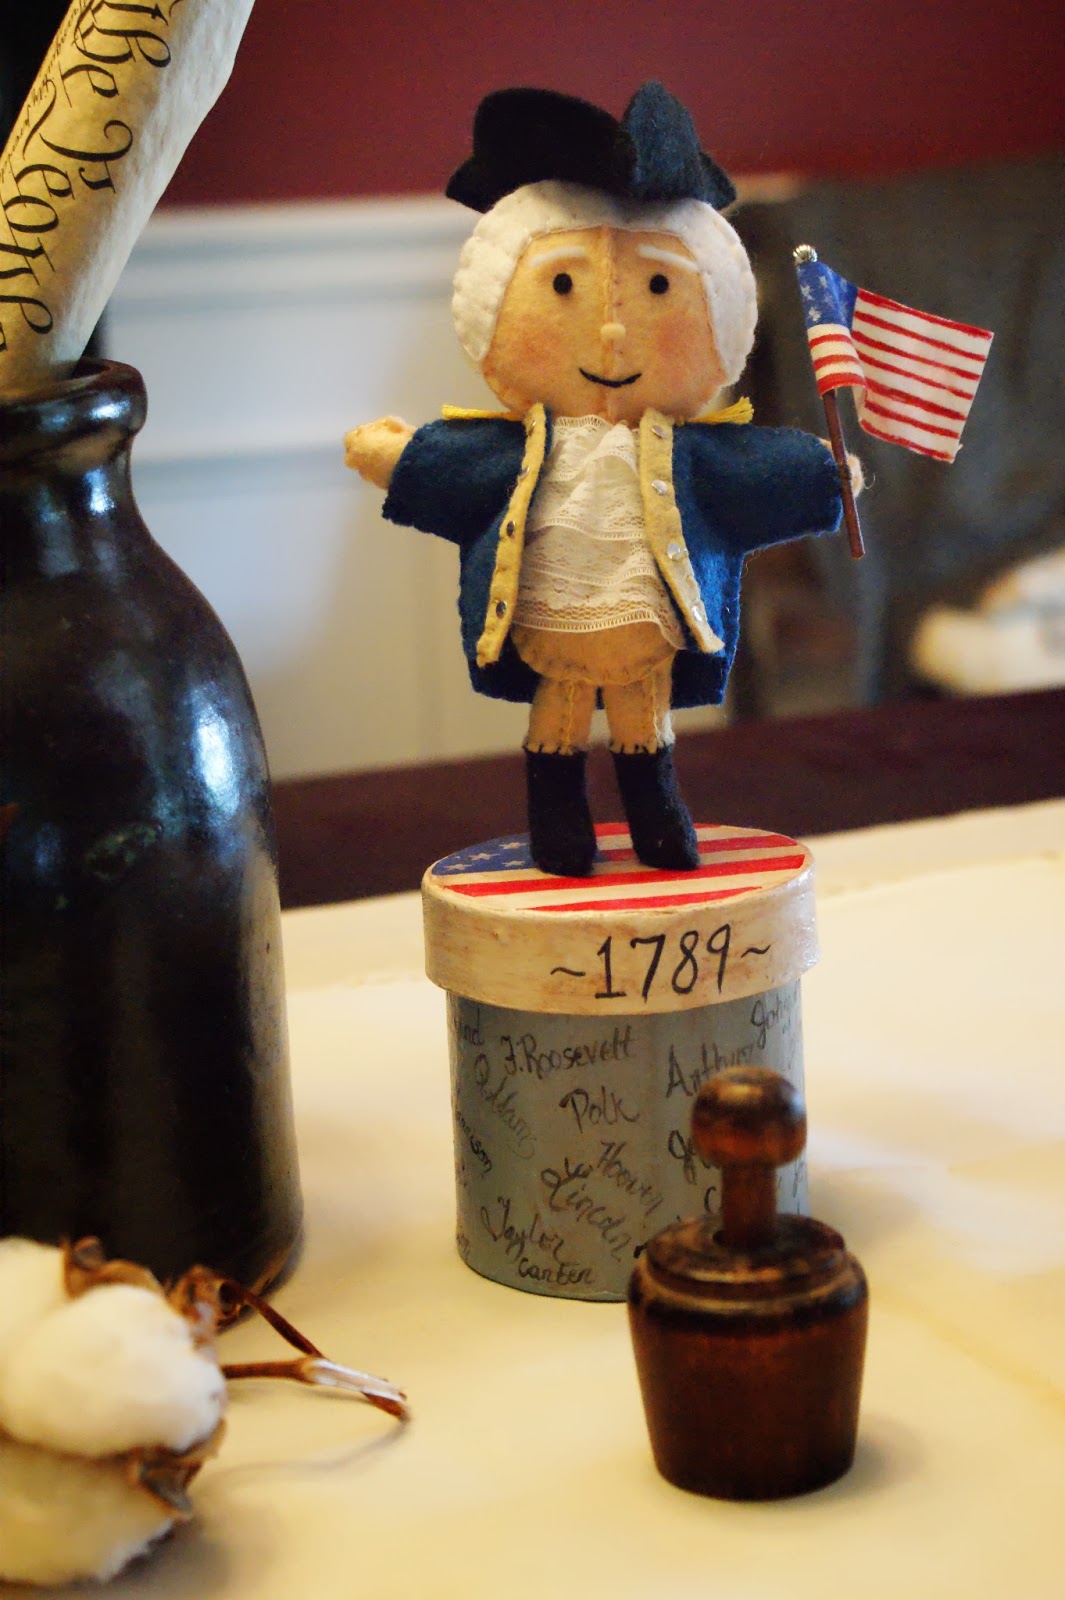
My dining room table. Even President Lincoln and President Washington decided to make an appearance. You can find their instructions here and here.


I placed a piece of floral foam in the bottom of this pewter pitcher. Stuck the flags in and then Liberty. I shredded some newspaper in our paper shredder and used that as a filler so that you couldn't see the floral foam. Shredded parchment paper would look awesome! If you decide not to place him in some sort of container to display him, sweet Carolyn sent me a tip that she came up with. Place a cute little end cap on the end of the wooden stick to cover the plain exposed end.

Thanks for this awesome tip, Carolyn!!


The back of Liberty. I glued the wings on using hot glue. Hot glue sets much quicker than my standard white craft glue. You can also see that the face piece is bigger than the shaker body. I matched the top of the face panel to the top of the shaker body and glued the face on. You can glue the banner poles onto his "hands" or do as I did and stitch the poles to his "hands". Which ever method that you choose, just remember to fold his "hands" around the poles to make it look like he is holding onto the poles.


I originally made this banner for Liberty, but as you can see it turned out too long. It does add a festive touch to the little birdhouse. I plan on making a tutorial for this banner on my other, poorly neglected blog Prims n' Pins. Hopefully before this weekend.

President Lincoln. Feather pen in his hand and the Gettysburg Address in the other.

President Washington with his tricorn hat. See the piece of cotton in lower left hand corner? I grew that in my garden last year! The flowers on the cotton plants are so pretty- some are pink and some are white.
---------------------------------------------------------------------------------------------------------------

----------------------------------------------------------------------------------------------------------------------
I used 10mm safety eyes (Hobby Lobby, over on the teddy bear/doll making section). I broke the stems off of the backs of the eyes and just hot glued the eyes on. The eyebrows are stitched on using 2 strands of embroidery floss.
Even though it looks like I stitched the face panel on, I didn't. I just used the button hole stitch to go around the panel and then glued it onto the shaker body. You really don't have to do all of that stitching, I just like the look of the buttonhole stitch :)

Here's a layout of the feathers and face panel. The feathers will be layered. I glued the layers using the white craft glue. Glue row 1 to face panel, row 2 to row 1, row 3 to row 2.
For the beak: Sew two upper pieces together, just along the rounded edge, leaving the back and bottom open. Do the same for the lower beak but leave top and back open (zoom the picture for a closer look). Glue the upper beak on and then glue the lower beak on. 
------------------------------------------------------------------------------------------------------------------


--------------------------------------------------------------------------------------------------------------------
Basic shaker body. Follow instructions here or here (in this tutorial with the pumpkin shakers, I forgot to add the cereal box cardboard, don't forget to add that to the shaker body and to the hat panels). Hat tutorial found here, add strips of red felt for the stripes and a piece of blue felt for the hat band. I glued some little silver stars on the band. Fun!!

If you have any questions, please don't hesitate to leave a comment with your question!

Have a wonderful night and day and don't forget to add Liberty to your shaker collection!! If you make Liberty, I would love to see him. It warms my heart to know that someone would take the time to create something that I designed and I get such joy seeing your handiwork!!
Happy sewing,
Holly


Monday, March 25, 2013

A Swap, A Parade and A Shaker

Look at the adorable banner! Debby of Cozy Blanket coordinated a Spring swap and then she made the swaps into a banner. It is so cute above my Easter Parade.

Easter Parade


Adorable bunny by Debby (Cozy Blanket). Thanks Debby! And I do think he looks like a Suzy's Zoo. Sweet paper duck by Jane (AraliaJane). I love the gingham paper! And tiny pom poms. Thanks Jane! 

Cutie pie bunny by Carol (Arts and Sand). I love how he seems to be leaping across my craft room. Thanks Carol! PS her stitches are so tiny! Look at this sweetest little wreath by Michelle and Ashley (The Tattered Quilt Cottage). 

A closer look because it is such a wee little wreath! And a tiny little bee! Thanks Michelle and Ashley! 

And look at this adorable prim bunny! He is in a packet of carrot seeds! So fun and cute. I have put him in my dining room on the pie safe. He feels right at home there. He was made by Penny (At Home in English Valley). Thanks Penny!
These ladies are one talented bunch! I am so thrilled at all of the bunnies, ducks and bees that I received. You can tell that each one is a true labor of love! I am going to proudly display this banner & bunny seed packet year around in my craft room. Thank you again ladies! 

Here's the little duck that I sent. The two rules: make 5 and it had to be something that reminds you of Spring. He also had a felt half egg that I placed him in. I made the egg also. He is about 2 1/2" tall, that doesn't include his feather tuft.
I hope that you enjoyed looking at Debby's Spring Swap! She has pictures of all the swap items at Cozy Blanket.
Thanks Debby! I had a blast!


Here's a close up of the Easter Parade.


Since everyone else had a Grand Marshall of their Parade, I figured that mine needed one too. Poor thing. She started out like this:
In pieces and with just her undies on >:0


Glue, fabric,tulle ,ribbon and flowers later and we have a well dressed Grand Marshall with an Easter Bonnet! She feels beautiful now.


Lamb shaker. Spring or Easter Lamb Shaker.
I used a material that looks like shaggy fur on her. I bought it at Hobby Lobby. It is real slippery and the back is kind of silky. I call it fun fur.

Make the shaker out of plain felt first. Then cut out the fun fur circle and glue it onto the felt on the side that you will be using for the face. Since this material looks like it would be hard to work with I thought that just gluing a circle of it onto the front of the shaker would be the easiest thing to do.

After letting the glue dry, trim the fur face so that you will be able to glue the actual face on. I trimmed it all the way down to the silky material. 


Palmer Bunny and Lamb
Glue the ears on. I used Elizabeth's (Creative Breathing) tutorial for the felt flower necklace. I think that she looks so much sweeter with the flowers around her neck. If you don't want to make flowers a ribbon bow would be just as cute.
*Don't forget for the head, cut 2 from felt and 1 from fun fur.

Have a wonderful day and please share if you have joined in on the Easter Parade, I would love to come visit,
Holly


Thursday, March 21, 2013

Shaking In To Spring!

I am so glad that Spring has finally arrived.......at least it has on the calendar. It is still very cool here and they are talking about a freeze warning tonight. Well, nothing like little lambs and fuzzy chicks to make it feel like Spring. These shakers are a little different than my normal ones.  


1. Cut 8 sections out of pink wool felt. These sections are for the head. 
2. Sew one section to another, and so on until 4 sections have been sewn together. I used the buttonhole stitch.
3. Transfer the face onto the 4 sewn sections. Stitch mouth, glue nose and glue the eyes on. The teeth can be added now or you can wait until the head is finished to glue them on.
4. Now sew the other 4 sections together.
5. Take the two halves and sew them together. You can add a shaker box before sewing the head closed, but I didn't bother, so really my shakers are not shakers :) . Stuff the head.
There will be a small hole at the top of the head that you can either sew shut or put a party hat on him. I cut a small circle and stitched it over the hole. 
6. Cut the ears out of wool felt. Cut two out of the same color felt as the head and cut two out of white felt.
7. Stitch the ears, I added pipe cleaners to mine so I can pose them.
8. Cut two tiny slits where the ears will go. My slits were a little smaller than 1/2". Stitch or glue the ears in place.
9. Make a collar.
10. There will be a small hole at the bottom of the head. Insert the prepainted wooden dowel into this hole. You can add some glue to the tip of the wooden dowel before inserting it.
11. Now add the collar and whiskers for the bunny. I used crochet thread for the whiskers.

Chick
The chick is made the same way with exception of the face and ears.
I used a pom pom for her collar.
I wanted to make a lavender chick but didn't have any lavender in my wool stash :( 


(same picture, different background. And look! The little chick with party hat popped in to say "Hi!")


Birthday party chick in a cloche. She is celebrating with a tiny felt cake. I wanted to make one of these for Christmas, so I bought a bunch of these cups. Well....the Christmas season was so busy that I never got around to making any. But now, I am not only addicted to party hats but also plastic cloches! You will probably get tired of seeing these little dioramas (because by now you must know that I love wee, tiny, little things), but I promise they will all be different *<:)  I might just make it a "Where's Waldo" type of fun- "Where's Cloche"! 


Funny bunny with party hat!  

I think bunnies with bent ears are so cute!

Just thought you might enjoy looking at some pincushions that I just completed.
Domestic Divas!
Vintage Diner theme.

Cherry Pie


Shasta Camper 

Mermaid

Bluebird of Happiness

Just if you are interested, there are more photos of the pincushions in my Etsy store.


Have a wonderful night and keep those crafty fingers busy,
Holly


Wednesday, February 27, 2013

Palmer Bunny Shaker


(instructions for shaker below)


Look at the adorable Leprechaun and his little buddy. Are they not the cutest things that you ever did see?!? Elizabeth sent them to me. They are perfect in every way. I love the leprechaun's little clover on his lapel. That is the sweetest touch. 

Oh no! Yep....I spelled "Blarney" wrong. The cat knocked over most of the letters, after I got through scolding him, I put them back on the table, but for some reason forgot to look and see if I spelled "Blarney" correct.  


Made a pipe out of pipe cleaners for the lucky little Leprechaun. 


Cardboard inserts cut about 1/4" smaller than felt. Glue the cardboard to the felt with white tacky glue. Let dry. Stitch face and side strip together using the "Elizabeth method" and stuff with fiberfill while stitching the back on.

Bend a full length pipe cleaner in half. I found that bending the pipe cleaner "legs" and hot gluing one leg to the top of the shaker box and the other leg to the side of the shaker box kept the ears from flopping over. So do this to both ears. 

To make this type of bow tie requires some basic sewing machine skills. I find it easier if I layer my front and back pieces together, right sides together. Trace the pattern onto the fabric, sew- leaving an opening for turning. I also realized that I needed some interfacing to make the bow tie stiffer. So, just add a piece of interfacing to your bow tie before turning. If you don't have interfacing, you could always glue card stock cut smaller than the bow tie to the back of the bow tie. If you prefer not to sew, a bow made out of Easter paper or ribbon is just as adorable!


Holding a carrot. I will do a future post on this carrot. Wouldn't a basket with a couple of these look adorable. 

No need for him to hold the carrot. He looks just as cute waving. I did omit the pattern for the mittens, I will try to remember to add it to carrot pattern.


Doesn't everybody have one of these collecting dust in their house? Give up on what it is? It's one of those fiber optic things that only lights up at the end of the fiber. It is kind of the rage at Christmas now. I have seen wreaths, floral arrangements, Christmas trees, outdoor decorations, etc  have fiber optics some where on them. Guess what else they are good for:

Whiskers! Two on each side. Work the fiber through the felt, sometimes a pre-drilled hole with a needle helps, just go at it at an angle because you don't want the whisker coming at you but you want it sideways.


I modeled him after the Palmer (maker of Easter chocolate) bunny. The Palmer Bunny has the really long ears and large bow tie. Don't forget his cottontail. Glue a pom pom or cotton ball to his backside. By adding a ruffle and hair bow you could easily make a girl bunny :)

Even though this little bunny is a get well card, I thought he was just too adorable not to share. I am using him with my Easter/Spring decorations. I hope that you enjoy him as much as I do.
Have a wonderful night,
Holly