Showing posts with label tutorial. Show all posts

Friday, February 26, 2016

Say Hello To Tommy


  This week has been a busy one. I finally got my quilt back from the quilter's. It has taken me several years to finish the Bee In My Bonnet Quilty Barn Along but whew....it is almost all done! The quilter that the quilt shop uses is so fast! I have used Kay before and she is amazing. Very meticulous and a perfectionist. I will be starting on the binding this weekend. To celebrate the end of this journey I wanted to make a fun little "tool". It is a needle book that is also a scissors fob. I made this scissors fob as a dual purpose tool years ago. I needed a scissors fob for a quilt class that I was taking. I wanted to be able to tell my scissors from my neighbor's if we happened to have the same pair of scissors but I also wanted to keep up with my needles. So as the old adage goes "Necessity is the mother of invention". I joined the two. Back then I just made a plain looking needle book/scissors fob out of felt with a felt heart on the cover. But this time since my cutie pie quilt is a farm theme I decided to go with something a little farmy. What is more farmier or cuter than a smiling tomato!


Tommy the Tomato


Such a sweet little guy :)

List of supplies:
8"x7" square of red wool felt
4"x6" square of white wool felt
2"x2" square of green wool felt
12" piece of 3/8" wide ribbon
4" piece of 1/8" wide ribbon
red thread and white thread for sewing machine
2- 4mm black beads for eyes
white craft tacky glue
black embroidery floss-one strand for freckles and two strands for mouth
sewing machine (optional-you could do this by hand)
scroll down for pattern

Cut out pattern pieces. Cut out all felt shapes. Cut out one slender piece of white felt (about 1/4" wide) the length of a white "page". Sew this slender piece onto the white page (photo below shows the placement).  Set aside.
Slender piece of felt stitched onto the first page.


Stitch the face on using french knots for the freckles, two strands of embroidery floss for the mouth and don't forget the eyes :)
Take the two pieces of red felt (one is the face and the other is plain) and sandwich the ribbon between them. Use your sewing machine zig zag stitch to stitch all the way around the tomato being very careful to catch both ribbons in these stitches. I like to use these settings for zig zag: stitch width 1.5 and stitch length 2.0. Go ahead and stitch the other two red felt tomatoes together, this set will be referred to as plain tomato. Now it is time to create the sandwich. Layer in this order from bottom to top: plain tomato, white page, other white page, face tomato. Stitch along 3/8" ribbon side to create a binding for your book-above photo shows stitch line. Click on the picture to see it better.

Stitch the button on. For the leaf cut a small slit, push stem through slit and using a tiny drop of glue, glue the stem onto the leaf. Now glue the leaf to the top of the tomato right above the eyes. Let dry for an hour or so. Yay! You have finished your sweet little tomato. You can add more pages if you like, just keep in mind that the more pages you add the longer your 1/8" wide ribbon will have to be to reach the button.


Now you will never get your scissors confused with anyone else's. 

Also great for rotary cutters!


2nd page with pins.


To make sure that the pattern prints out to correctly I have included a scale on the bottom. It is in inches. You can always enlarge or shrink the pattern according to how big or small you want your scissors fob/needlebook. 
Hope that you enjoy making him and don't forget to keep those hands busy,
Holly

Thursday, February 18, 2016

Yertle The Measuring Turtle


I love turtles! We've even had turtles as pets. One was named Stinky and let's just leave it at that. His name suited him. He was found in our yard so we returned him back to his home (pond in our backyard) after a few days. The other turtle we had was named Yertle. We kept him for about a year and a half and then let him go also. No, we weren't being mean to let him go in the wild. My daughter's teacher's husband ran over him with the lawnmower, so he became the classroom pet while he recuperated . We inherited him when school was over for the summer and then once he got a little bigger we just simply returned him back to nature where he belonged. So it is no surprise when I saw a turtle pincushion/measuring tape at a craft store I immediately bought it. He was cute but I knew that I could make him cuter! 
Here is the original sweet little guy. 
Now you can make your own! Gather the following supplies:
scraps of fabric-about 13 if you want a scrappy turtle shell
scrap of solid color fabric
2"x 4" piece of orange felt
needle and thread for hexagons
round retractable measuring tape
small scissors
cardstock or note cards for the hexagon templates
black & orange embroidery thread
2-4mm black beads
stuffing
6" piece of 1/8" wide ribbon
disappearing ink marker
sew in interfacing
sewing machine
2" diameter retractable measuring tape for sewing
****Instead of making a hexagon turtle shell, you could use a solid piece of fabric and he would be just as adorable. For a more prim look use just wools. I would still use the interfacing on both the cotton fabric or wool. 


**Please note that my scanner/copier has finally bit the dust. I had to take a picture of the pattern and then upload it to the computer. When you print this pattern out PLEASE double check it with your ruler. I have added a 1" scale in the bottom left corner and some of the patterns have measurements on them. You might need to adjust your printer's % to get the pattern to print out the correct size. Please do not make copies of this pattern and sell it. You are welcome to make as many of the turtles you like but just don't sell my pattern. You are also welcome to send your friends over here to my blog for the pattern but just don't send them copies of my pattern. Thank you so much and sorry to have to state this but I have had numerous problems in the past with others not playing so nicely.

Do you recognize any of the fabrics? I used several of Lori Holt's fabric lines! Cutie patootie!

Cut the hexagon and half hexagon templates out of a thick cardstock or note cards. Notice the brown hexagon in the bottom right corner. I glued my large hexagon template onto a piece of sandpaper to keep it from slipping on the fabric while I traced around it. You only need to cut out one large hexagon template since you will use it just for tracing. Punch holes into the smaller hexagons, this will make it easier to remove them after sewing them together.


Place the paper hexagon onto the fabric hexagon and stitch around it, using tiny stitches and only place a stitch in the corners. If you don't understand this part, there are many tutorials online that go into greater detail.

Taking a tiny stitch. Click on picture to enlarge.

This is how I kept the template in place while stitching the half hexagon. Try your best to keep the paper template in place until the whole piece is stitch together. You can also put a pin at the bottom along the flat edge to keep the template in place while you sew the hexagons together.

I usually just finger press the edges.


All the hexagons and half hexagons completed and now it is time to stitch them together. Instructions are available from various sources online. Pinterest is another good place to look for instructions on sewing the hexagons together.

Hexies  and half hexies stitched together. See the papers are still in place. I went ahead and took the half hexie papers out.

I use tiny embroidery scissors to pop out the papers.

Now iron the whole thing.

After you cut out the sew-in interfacing circle it's time to stitch it onto the hexagons. I like to sew close to the interfacing edge. 

Trim the extra pieces of the half hexagons off, leaving about 1/4" fabric from interfacing sewing seam to cut edge. Baste stitch (red thread) around the hexagon circle right next to interfacing sewing seam. You will use this baste stitch to gather up the circle.

Trace the legs and head onto the solid fabric. Stitch on the traced line.

Cut the legs and head out. Leaving about 1/8" seam allowance.

To turn the tiny pieces, place one dowel inside of the leg piece and one dowel on the outside. Start rolling the leg up over the second dowel. Keep doing this until it is completely turned inside out. Do the same for the head. Lightly iron legs and head.


Lightly stuff the legs but firmly stuff the head. Stitch the long middle strip. Be sure to not forget to baste the area that you are suppose to baste. It is written on the pattern.


Start pinning the bottom circle to the side piece. I like to pin the side piece and bottom together before adding the legs and head. Match the head dot and tail dot on the bottom to the head dot and tail dot on the side. It should look like the above picture.


 Now pin the side piece and bottom together before adding the legs and head. Pin all the way around. Pinch the turtle head, aligning front head seam to back head seam and stitch with sewing machine. In the above picture you can see where I stitched my turtle's head to keep it nice and neat before I placed it between the circle and side piece.


Make sure that your placement marks haven't disappeared. Mine did and I just placed the pattern back over the circle and remarked. Add the legs and head and pin into place. Make sure to orient the head correctly. Stitch with sewing machine using 2.0 stitch length. Go slow. Don't worry if little tucks form. I think this gives the little turtle some charm. 


This is what the turtle will look like, but do not turn him yet. I will refer this part of the turtle as the "bottom part".

Take the top circle and pull the basting stitch so that the circle forms a "cup".


Place the hexagon cup into the bottom part and pin. As you can see I like to use a lot of pins. Leave about a 2" area where the tail will go unstitched. This will be where you turn, insert the measuring tape, and add stuffing.


 Stitch- don't forget to use a 2.0 stitch length. Stitching this can be a little fiddly so don't give up.


Carefully go inside your little turtle and clip the basting stitches. This is where the measuring tape will come out. Now place the measuring tape inside the turtle and pull about 3" of tape out of the hole. Make sure the measuring tape's button is on the bottom. Stuff, using very small stitches, stitch the opening closed.


Now it's time to put the eyes on. Knot the thread and start at the base of the neck push the needle up to where you want an eye. Attach eye and then attach the other eye. Take the thread back down to the base of the neck and tie off. Attach the neck to the shell by using small stitches and then glue on the tail. Let dry. Yay! You are finished with the turtle part.


Tail glued on.


 Time to make the little fish. Cut two fish out of orange felt. Make a french knot on each piece for the eye. Glue the 6" piece of ribbon onto one wrong side. Place the two pieces of felt together and stitch using the button hole stitch, you could also whip stitch it.


Your sweet turtle is finished! Now make a few more and give them to all your stitchy friends! They are very addictive. You could even make them to match your projects as I did with Yertle the Turtle.
If you have any questions, please don't hesitate to ask.
Yertle and Mertle: bff for life!

Have a happy day and keep those 10 little fingers busy,
Holly


Saturday, December 14, 2013

Yarn Snowman


It's no secret that I love ornaments! Vintage, handmade, or store bought, it doesn't matter. Do you have a special ornament that brings back childhood memories? As soon as you see it, it transports you back to when you were 9 years old? I am very lucky to have a few of my maternal Grandmother's (MaMa) ornaments that she used for years on her tree. One of my favorite ornament or rather ornaments are of Mr. and Mrs. Santa Clause made out of yarn. Do you remember these?
My version is a snowman.

Below are the vintage yarn ornaments. Brown with age (hard to tell in this photo), moth eaten faces, missing parts, but I love them anyway!!
I am not sure who made them, I must ask my mom. They bring back the sweetest memories of her house: Christmas baking, laughter, cousins playing, parade on tv, practicing for our Nativity production, wondering if it would snow, would Santa come?, fire crackling, chestnuts from my grandfather's tree, roasting hotdogs over open fire, tractor rides into the woods and my grandmother's famous fruitcake!

Supplies to make your own Yarn Snowman:
yarn
black wool felt
red wool felt
pink wool felt
green & red wool felt
1/4" wide red ribbon
small black beads-5
black embroidery floss
Scraps of cardboard: cut one 14"x6" and one 5"x3"


photo1
Wrap yarn 30 times around largest cardboard. Carefully slip off.

photo2
Lay the yarn on the table and tie a 6" piece of yarn around the middle. This will be at the top of the head.

photo3
Fold the yarn in half with the piece of yarn you just tied at the top. Now go down about 11/2" down tie a 6" piece of yarn for the neck. Then tie another piece of yarn for the waist about 1 1/2" down from the neck. 

photo4
To make the arms, wrap the yarn around the 5"x3" cardboard 30 times. Carefully remove and tie a piece of yarn at both ends-see photo.

Make a hole with your finger all the way through the abdomen and insert arms. It is not necessary to glue or sew the arms to the body.

photo4
Now you can cut the loops on the hands and feet. Trim them as you would a pom pom. 

For the face:
Cut the face out of white felt. Glue cheeks and nose on. Stitch eyes on and then embroider mouth and eyebrows.

photo5
Make the hat the same way as Abe Lincoln's hat. Glue ribbon around hat body and then glue holly leaves and berries on. Tie a 8" piece of white or black embroidery floss onto the yarn (this yarn is the piece that you tied in the middle in photo2) for a hanger. I then threaded a needle with this floss and went through the bottom of the hat, not the middle of the hat but off to the side) and then back out of the side of the hat. I know this sounds confusing, but the photo5 explains it better. I did it this way because I like Frosty's hat a little off center. If you like you could always go straight through the middle of his hat.


My vintage yarn Mr. and Mrs. Santa Clause. Wouldn't these look so cute tied onto gifts instead of bows? I also plan on make the Clauses this year too and if I get to them I will post a picture.


Now this is just plain cotton pickin' fun!

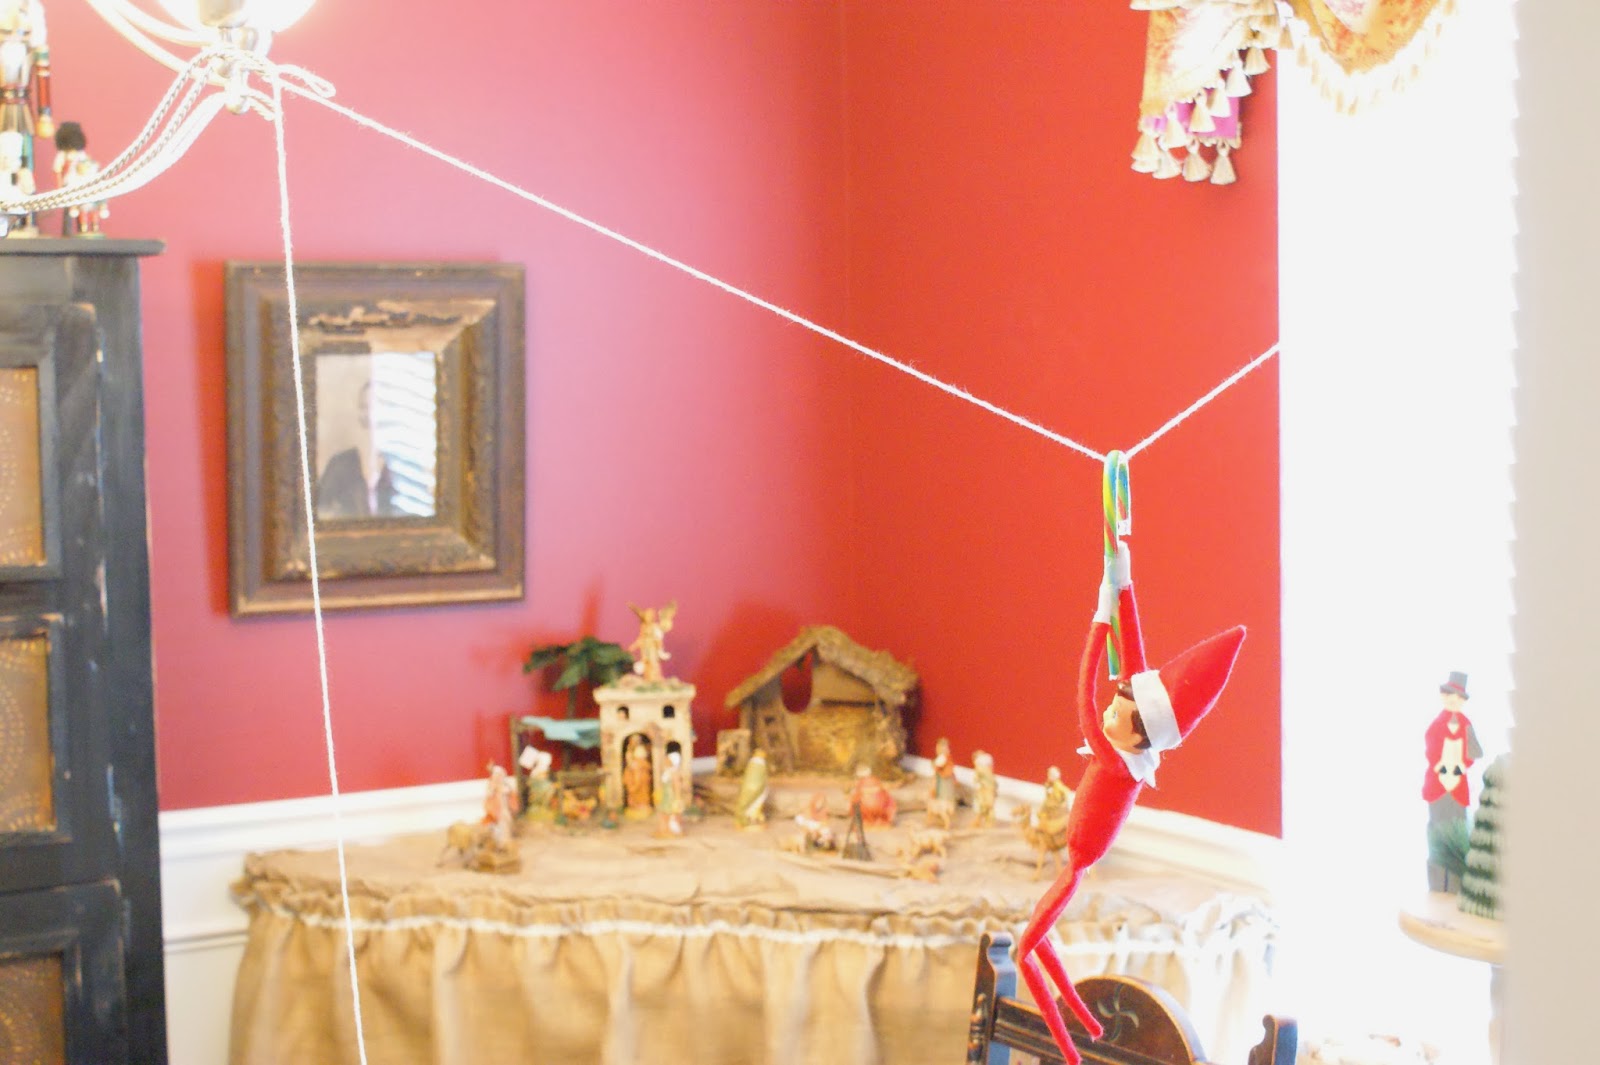
Elfie up to his old tricks. He is using a candy cane and yarn to zip line across the dining room. D#2 left the yarn and candy cane out for him to use the night before. At night we can hear the soft pitter patter of his tiny feet running across the carpet. Our Bethlehem village in the background. Every year hubby and I on our anniversary (which is today! 22 years!!) go to the Peppermint Forest (local store, you can google it: Peppermint Forest, NC) and pick out pieces to add to the village. We went this morning after a nice breakfast at Panera Bread with D#2, Son and his girlfriend (D#1 had a final today and couldn't make it). It's also a tradition to buy a Holiday Loaf from Panera. At Peppermint Forest we selected a few nice pieces to add and had such a great time. The picture above was taken before the new pieces were added. 

Display tray of vintage cuteness. Idea taken from Gooseberry Patch Christmas book. 

Santa Tater
D#2 had to decorate a potato for Thanksgiving Market (school function). Our job was to create a potato character that doesn't look like a potato but, we couldn't carve it or poke holes in it. D#2 wanted to make hers into a Santa. She glued everything and I cut it out. She handstitched the hat and back of the Santa suit. She loved the sewing part the best, her words. We also came up with a song in the tune of Santa Baby:

Santa Tater, just slip a
plate of fries under
the tree, oh please.

Santa tater, a bottle
of ketchup for me,
red not green.

D#2 had a hard time believing they use to make green and purple ketchup years ago :)

Have a wonderful day and weekend,
Holly