Sunday, July 31, 2011

Time For A Change!!

I am not sure why, but around this time of year I start thinking about remodeling. Not the tear down walls, make hubby cry kind of remodeling, but what I like to call "little touches". Such as, painting, installing wainscoting (which I lllooovvveee), adding crown molding, etc. I have been wanting to change my pantry doors for a while now. I wanted a selvaged half glass/half wooden door. You know...kind of like a back door. Nine panes of glass on upper part and regular style door on the bottom. I would need two doors, since I have a double pantry. Something similar to this:

Above: That was until I found this!!!

Above: HOW ADORABLE!!! I had a fit when I saw this! I love it. Look at the handle. Wish I could do it to my pantry. Dear hubby thought I was having some kind of fit when I stumbled upon this photo. I might have squealed, not sure, but I know I started talking real fast and kept saying "Look, look, how adorable!!". He just didn't really understand my excitement. But look below. Adorable!!

Above: Really....can it get any cuter <3  I know that I really couldn't keep my pantry that neat, but with that apron practically covering the disaster inside, why not!?! 

Put a few more things in the Etsy shop. I really had so much fun designing these. I have a million ideas bouncing through my head right now. Next on my list: a Fall one!


Above: Not sure what they are? A pincushion :)

This past week I wanted to make some banana nut bread. I keep my ripe bananas in the freezer. I just place them into a gallon size zip bag and add to it as my bananas ripen. Side note: bananas tend to ripen really fast for me. I like them with a little green and slightly firm. As soon as they get a brown spot on them, into the freezer they go. I tend to have a weak gag reflex and will gag really bad on a riping banana. 
Here's what they look like when you remove them from the freezer:
Above: Yuck!! Total gagness!!! They turn real dark when you freeze them. I do freeze them with the skin on and then just pop them in to the microwave for about 20 seconds and peel the skin right off. I them put them in a microwaveable bowl for another 20 seconds and then I reserve about 1 TBS of banana juice to add to the bread batter.

Above: Yummo!!!

Above: Sure wish you could smell it. Something so comforting about banana bread smell.
The recipe that I use is a little different. It calls for sour cream. This makes a wonderful moist, very moist, bread.
Banana Bread
  • 1/2 cup (1 stick) butter, at room temperature, plus more for pan (use butter for pans! )
  • 1 cup granulated sugar
  • 2 large eggs
  • 1 1/2 cups unbleached flour
  • 1 teaspoon baking soda
  • 1 teaspoon salt
  • 1 cup mashed very ripe bananas
  • 1/2 cup sour cream
  • 1 teaspoon vanilla
  • 1/2 cup chopped walnuts or pecans

Directions

  1. Preheat oven to 350 degrees. Butter a 9-by-5-by-3-inch loaf pan; set aside. In an electric mixer fitted with the paddle attachment, cream butter and sugar until light and fluffy. Add eggs, and beat to incorporate.
  2. In a medium bowl, whisk together flour, baking soda, and salt. Add to the butter mixture, and mix until just combined. Add bananas, sour cream, and vanilla; mix to combine. Stir in nuts, and pour into prepared pan.
  3. Bake until a cake tester inserted into the center of the cake comes out clean, about 1 hour 10 minutes. Let rest in pan for 10 minutes, then turn out onto a rack to cool.
Hope you enjoy this recipe! We sure did! It's raining cats and dogs here.
Stay dry,
Holly

Friday, July 22, 2011

Plain Jane Pincushion Tutorial

I love pincushions! They are such functional, artsy little things. While I have an assortment of neat, cool and stylish pincushions the one that I really love is just the basic plain jane one. The main reason that I love it is because it is such a snap to whip up. No sewing machine involved! Some pincushions that I make can take up to 20 hours! But this little baby takes a total of 30 min-1 hour (unless of course you have to run to the store right in the middle of making it--but that's another story for another day).
Supplies:
Scissors
fabric square about 9"
2" piece of felt
stuffing
large eye needle
dental floss
sand (optional)

Above: don't ya just love the tiny acorn. He is not functional but adorable. The cap is a real acorn cap and he is made out of clay.


Above: Cut out an 8 1/4" diameter circle. I used a compass to draw a circle.


Above: 4 1/8" on compass. Click on photo to zoom in.


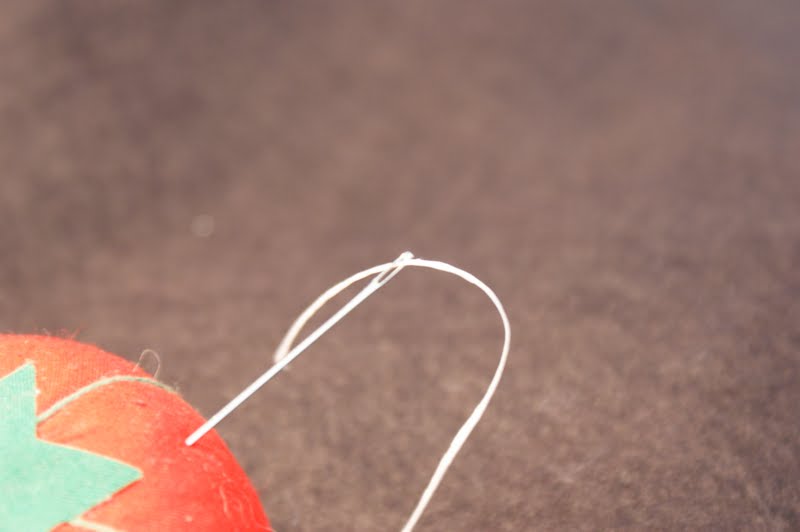
Above: I like to use a large head needle. I also use wax dental floss instead of cotton thread. The dental floss is very strong and will not break like the thread will.

Above: Make a running stitch all the way around the circle. Take 1/8" stitches. This will help to bring the fabric together tighter.


Above: Make sure to start the beginning  stitch and ending stitch on the right side of the fabric. Click on picture for a closer look. 

Above: I like to add a little sand bag to the bottom of the pincushion before I start stuffing. This sand bag is not necessary, I just add it for weight. You could also use crushed walnut shells (bird section of pet store), sand (found in florist section of discount stores), *beans, *rice (*the food type could attract bugs) or emery. I like to use a little sand bag because I have found that when sand is used it tends to sometimes work itself out and make a small mess. The sand bags can be small, maybe 2" or 3" in diameter.

Above: Lightly cinch the circle closed as above. This will help keep stuffing in as you stuff the pincushion.

Above: I use a combination of wool and fiberfill stuffing. I like wool because it packs tightly and looks smoother than fiberfill, but is a little more expensive so that is why I combine it. Also the lanolin keeps pins and needles from rusting.

Above: Try to cinch the pincushion has tight as you can. This hole is probably 1"-1 1/2" wide.
Above: I use my cuttlebug to cut felt out. I love using the cuttlebug this way. It cuts the felt out very clean with sharp crisp edges. One tip that I have found is make sure the felt you are using is wool. The cheaper felt that you get from the large discount stores just doesn't work as well. It will work but you have to trim the shape out because the cut is not as clean.

Above: The shape comes right out. Very clean and crisp edges. At this point you may want to think about your embellishments. Use your crafty imagination. You can glue buttons, game pieces, charms, vintage clipon earings, yoyos (fabric ones), fabric flowers, etc. This is your creation-go wild! If you don't like using glue, just find things that you can sew on. Just remember if you want your pincushion to be functional try not to go too wild with the hard embellisments, you don't want to jab a pin or needle into the pincushion and have it break because a button or charm got in the way.

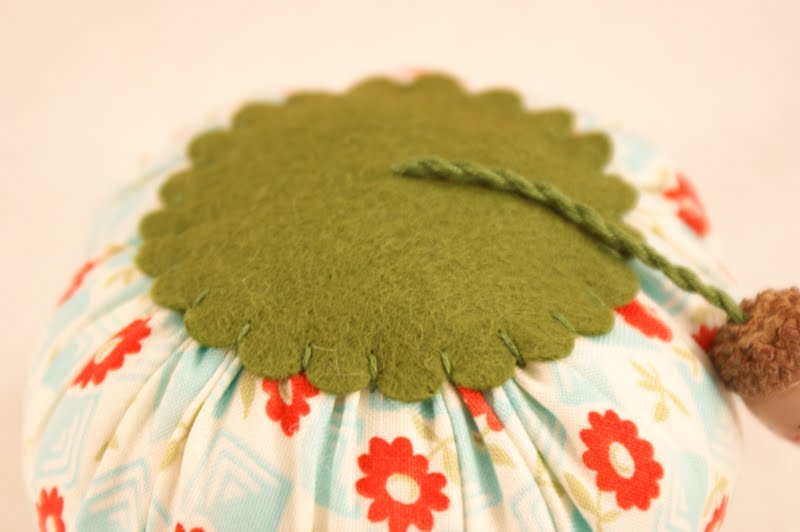
Above: I put the acorn on the felt top first before I put the felt on the pincushion.

Above: Little acorny, not functional at all, but super cute. Wouldn't it be fun to do a fallish pincushion with a couple of these cutie acorns. 
Hope that this tutorial is clear enough. If not just send me a comment and I will try to answer your question.
Sew....go ahead and try your hand at this fun and easy project. Remember no sewing machine required!!
Have a wonderful and crafty day,
Holly

Tuesday, July 19, 2011

Jar Salsa vs. Pico De Gallo

Jar Salsa vs. Pico De Gallo...
I must confess, I no longer eat jar salsa. It just doesn't taste right.
Here's a great recipe that I enjoy making at least once a day. I love it for lunch, goes great with a cheese quesadilla. All you need is:
1 tomato
cilantro
jalapeno
lemon juice
onion-mild kind, we're eatin' it raw!
Chop everything, I like big chunks about the size of a pea. Handy hubby likes it chopped very fine, it looks like baby food (aka soupy salsa). Eat it with lime corn chips! Some day I am going to make my own chips....

Above: The jalapeno and onion are from my garden. The tomato is from farmer's market. I really don't like to use bottled lemon juice, but it was all I had. I did grow cilantro this year, but after a few weeks, it goes to seed and peters out. I did find out this past week that it is best to buy seeds and grow cilantro in two week intervals.

Above: All chopped up and ready to eat! Wish you could smell it. The cilantro is awesome!
I finished a pincushion that I had been working on. This time it is more of a modern pincushion, meaning that I used bright colors and new fabrics. The fabric line is from Bonnie and Camille. I love using vintage fabrics, but this fabric line just spoke to me. I hope that I can make some place mats using this line and maybe do a tutorial on them. Napkins would be cute too!


Above: it is a pear pincushion and snip-it bag.


Above: hand embroidered pear.

Above: Two hand sculpted pears. The photo is kind of dark. They look so cute in person.
That's all that I have to share for today, hopefully I can get a post in tomorrow.
Have a wonderful day, keep those hands busy!!
Holly


Monday, July 4, 2011

Happy 4th of July!!

Happy 4th of July!!

Today we are just hanging around the house. Sometimes it is so nice to have nothing to do. We plan on grilling tonight and watching the neighbor's fireworks. I did get some sparklers for the kids. I just love sparklers!! Here's the promised pasta recipe. Everyone gave it a thumbs up.

Rotisserie Chicken Pasta Salad
A Rotisserie Chicken at the market
A can of artichoke hearts
Grape tomatoes
Whole grain pasta
Greek Olives (pitted)
Red Onion
Salt and Pepper
Mayo
Italian Dressing
Cook your pasta – al dente.  Shread your chicken.  Cut the artichoke hearts into smaller pieces from what they come in the jar or can.  Slice the Red Onion.  Cut olives in half (remember no seeds)   Mix all ingredients.  For the big bowl, I added two heaping tablespoons of mayo and about 1/4 cup of italian dressing.  Mix.  Chill.  (recipe from Stories from My Day blog)

Have a wonderful 4th!!
Holly

Thursday, June 30, 2011

A Beary Sweet Pincushion

I have been having fun in the designing area of things. I have been working on a bear pattern....well...actually it has been in the works for several years. Kind of an off again, on again thing. This pattern has been tweaked and redone so many times. Finally I have a pattern that I am ok with. It is still not perfect, or actually it still has some flaws, but I am happy about it. I have made many bears over the last 15 years, some I gave away, some I sold (in yard sales) and a few that I have hung on to. Most of these were made using a pattern designed by someone else. I have made some bears using my own pattern, but like I said before, these patterns really needed tweaking. Maybe one day I will be brave enough to show you the funny little bears. I absolutely love the process of making a teddy bear. The only problem that I have really run in to is that it is really hard to find the mohair. The company that I use to use Spare Bear Parts shut down a few years ago. Most of the companies that I have found are located overseas, Australia, Europe, etc.  So the shipping on these orders is usually around $20+. Bummer. Must do more research for US companies. I do love The Old Pincushion's mohair and her bears are so cute. She has very reasonable prices, but is located overseas. Her shipping is very fast, though. By the way, she also has a contest going on right now and you can win the most adorable pig.

Above: Little bear cut out and ready to stuff.

Above: Stuffed with excelsior, this is the traditional stuffing of vintage bears. She is also stuffed with wool and a little bit of poly stuffing.

Above: A vintage quilt square. Can you see the old newsprint? The ladies use to make patterns from old newspaper. Most of these prints are vintage feed sacks. I used this quilt square to make a pincushion. You will see it in the pictures below.

Above: Little bear almost finished. Trying to figure out with ribbon looks the best.


Above: WHOA.... Creative chaos at it's finest. What a mess!

Above: This sheet of paper is my work surface. For some reason I can't keep everything stored away. As soon as I am finished with a project I put everything away.

Above: Little bear all dressed up. She is sewn to the pincushion and the strawberry is sewn on also. It is stuffed with wool to keep your pins from rusting. 


Above: She is all finished except for her eyes. They have been ordered. The ones that I had for her looked too big. She is 7 1/2" (standing up) and those eyes would probably look better on a 9" bear. So, as soon as her eyes come I am going to list her on Etsy.

Above: All you need is a little bit of mohair and 15years worth of pattern goofing. This bear was the first bear that I have actually used mohair on. The other bears were made out of all types of stuff: fake fur, wool felt, old jackets, cotton fabric, velvet, blue jeans (really tough to work with-don't recommend it) and other fun stuff.
Have a wonderful and blessed day, and don't forget to keep those fingers busy!
Holly

Tuesday, June 28, 2011

Whatcha' Working On

June has just flown by!! I can't believe that July 4th is next week. The garden is growing nicely. We have picked a few tomatoes, jalapenos, bell pepper and one squash. We ate the squash in a salad last night. Tonight we are having pasta salad and crusty bread for supper. I am going to add a couple of cherry tomatoes from the garden to it. I will post the recipe tomorrow, if it gets the thumbs up tonight.

Just a few crafty things to post. Mainly a "whatcha been working on" kind of post. Most of them are on Etsy now.


Woolly Bear Caterpillar.


Little felted mouse with her woolly bear pet.


Above: Taking Woolly Bear out for a stroll.


Above: new pedestal pincushion. Made out of 100% wool.
Needle/Scissor fob

Above: I stitched designs around the pincushion. Mouse, kitty and house. Kitty is flying a kite. The two hand sculpted pins were a blast to design. The cheese was especially fun. Poking the holes in it to get Swiss cheese.
 

Above: scissor fob. See how handy the needles stay, right by your scissors. The red thread keeps them looped to your scissors, so that when you are sewing in a crowd and someone has scissors just like yours, you can tell them apart. All of the stitching on the pincushion and fob was hand stitched, using various stitching methods.
I will be back tomorrow with some more. My computer is very slow tonight, taking forever to upload the pictures.
goodnight,
Holly

Thursday, June 16, 2011

Finally......Time for Blogging!

Boy, sure is nice to be back on schedule. The past few weeks have been a whirl wind. With school winding down, teacher gifts to be made, D#1 graduating from High School, D#2 graduating from preschool and Son getting his learners permit and driving us crazy.....ahem....I mean wanting to drive us everywhere and I mean everywhere.
I am in the process of relisting some things on Etsy and adding some new stuff. I have a few more things I want to list and probably won't get that done until this weekend.
Anyway, here's some pictures and I promise that I will get a "good" post in sometime this weekend :)
New listing on Etsy. Chef Mouse on his Cupcake Pincushion.
Two pins are included: sprinkle container and spoon with icing.

Mouse is only 2" from the tip of his hat to the tips of his toes.


D#1's graduation. She's the one in the purple.

Above: What in the world? She blurred...... Thank goodness for the professionals. I'll order my picture tomorrow.

Above: the traditional hat throw.

Have a great night and I'll be back tomorrow,
Holly