Thursday, June 7, 2012

A Garden Tour

Hey again! Sorry it has been so long since I blogged. A big comedy of errors....lost camera cord, lens of camera broke, computer messed up, computer fixed then screen broke, etc. We have been very busy around the house. Spring came and went, college kid home, elementary kid graduating Kindergarten, making end of year gifts for teachers and a gift for a principal that is retiring. Not to mention the little kindergartner wanted to make gifts for staff at her school. I did start really early on those gifts. We gave them begonias (my favorite flower this year!) in a cute pot with a hand stamped vintage spoon. I stamped the recipient's name on the spoon: ex. Ms. Jennie.

 I think that blogger has changed some settings because I can't comment on each picture. It seems the pictures come in twos. Anyway, did you happen to witness the Transit of Venus? We did. College kid googled how to safely view it. Of course after a couple of hours of "Mom....how can we view the transit?" Me: "Not sure.." then "Mom....how can we view the transit?" Me: "Not sure..." after several hours of this I finally said "Just Google it!". And she did. Come to find out all you need are a pair of binoculars. No, don't look through them, just reverse the binoculars and let the sun shine through them onto a piece of white paper. Kind of like when you were a kid and had a magnifying glass and let the sun shine through the magnifying glass on to leaves, paper or whatever. Except the binoculars won't catch the paper on fire! We were very surprised at how well this worked. We could even see the sun spots. It was a cloudy day and the clouds kept on blocking the sun, but as you can see in the above pics we did get it to work. In the top photo you can see Venus, it is the little dot on the sun
  on the lower right side. The second picture shows a cloud starting to cover the sun. Just ignore the stick. The camera had a hard time focusing on the paper.

Here a few shots of around the yard. Promised my sister that I would show her some of my flowers.
Above: Begonias, marigolds, pansies, and a beautiful caladium that had not been planted yet. See the pot on the left side of the gnome next to the red bench? The dog decided to dig in it one night and bed down there. She destroyed 3 snapdragons, 4 begonias, 1 coleus and a caladium. I bought this replacement caladium. I love it. It has a red color that looks like it was splashed across the leaves. 


Above: this little corner of the deck is my "potting bench" of sorts. See the rake head hanging above the bench. It had been laying in our yard next to the shed for about 3 years. Last week I was raking and rediscovered it. I thought it would make a great hanger for my small garden tools. A few days after I hung it, Dear Hubby saw it and said "Well...I was going to fix that rake. Guess I can't now." Haha....it had been in the yard for three years! The big kind of ugly black planter is something new that I am trying. It is an Earth box. It uses a self watering, fertilizing system. I planted one tomato, jalapeno, squash, zucchini, cucumber and something else that I forgot to label. I have two other boxed and will report on how well they work this summer.

Above: My favorite: Dragon wing begonia. It was small when I purchased it, now it has doubled in size. See the twigs planted it the Terra cotta pot. Those are some rhododendron cuttings that we are rooting.

Above: Here's my favorite spot. This year we have added twinkly lights and a mister system to the pergola. The mister system is great for the plants and after working in the yard and getting hot, it is nice to sit under it and cool down.


Above: Herbs and a Super 100 tomato. The herbs are: sweet basil, purple basil (tiny), boxwood basil, oregano (hot and spicy), thyme and a pot of strawberries.


Above: Moss rose. I love this. It is the first year I have grown it and it loves the hot part of the deck.

Above: Planters in front of the window. A kind of a window box of sorts. No, the wire fence is not for rabbits. It keeps Nosy Rosy, the dog, out of the "window boxes". She loves to stand in the planters in order to look in the window and whine.


Above: Hen and Chicks succulent. Ugly wire, again, for the same reason.


Above: lettuce

Above: Cucumbers, tomato, eggplant, squash and tomatillo.

Above: Purple cherry-size tomato plant.

Above: the herbs again. A closer look.

Above: Neighbor's yard. See the tiny little rabbit.


Above: Bad boggy area of yard. We finally decided to "fix" this area. Every time it rains, this area is a boggy mess.

Above: We are installing a Japanese inspired garden. All of the grass will be gone and mulch, a rake garden and small goldfish pond will take it's place. Right now we have the boardwalk installed. The goldfish pond will be to the left of the picture and rake garden to the right of the picture. I will post more pictures soon. Hopefully we can get the Japanese Garden finished before summer is over.

Above: A corner of the butterfly garden. Black eyed Susans and a butterfly bush are planted here. The birdbath is used alot. I love gnomes, but usually try to hide my gnomes behind stuff so they are not really visible because I don't want to look like "that" kind of a person!


Above: Some of my daylilies.

Thanks for stopping by and visiting my garden,
Holly

Saturday, April 7, 2012

Little Mohair Bear

The past couple of days have been cooler. A great change from those 80° days. This past week D#2 had an Easter Egg hunt and party at school. She also had Jerusalem market day on Thursday. She wanted to dress up as Martha. Her friend was dressing up as Mary, the sister of Martha. I'll share pictures tomorrow.

Last week I made a Taco Ring and the family inhaled it! I haven't made it in years and forgot how much they enjoyed a Taco Ring. It is so simple to make. We dressed ours up with fat free sour cream, green onions and salsa. I had wanted to use ground turkey breast but used organic beef instead. Our grocery store is hit and miss with the ground turkey breast.
Taco Ring
  • 1 lb ground beef    

  • 1 pkg taco seasoning mix

  • 1 cup (4 oz) cheddar cheese 

  • 2 Tbsp water

  • 2- 8 oz refrigerated crescent rolls

  • Preheat oven to 375

  • Brown ground beef and drain grease.

  • Stir in taco seasoning, water and cheese.

  • Unroll crescent rolls and separate. Arrange triangles in a circle on a round baking stone with wide ends overlapping in center and points toward the outside. There should be about a 5 inch diameter in the center.

  • Scoop meat mixture evenly onto widest ends of dough at center of ring. Bring points in and over and tuck underneath the wide end.

  • Bake 20 to 25 minutes or until golden brown.

  • You can garnish with bell pepper, lettuce, salsa, tomatoes, onion, sour cream, olives, etc.


  • I finally made this sweet little bear. I have had the pattern for about 1 year. The pattern is from The Old Pincushion. She has so many adorable patterns and kits. I usually don't use someone else's pattern, but this one just tugged at my heart strings. Sometimes I get tired of using my patterns and just want to follow someone else for a while. She doesn't allow the sale of the finished product, so this little guy is mine! I rarely keep anything for myself so this is a treat, even though it did take me almost a year.

    I haven't come up with a name for him yet. He is string jointed on his arms and legs. I had not used this method before. I don't think I would ever use it on a bear that I am going to sell. The joints just don't seem strong enough. He was a very simple and easy bear.

    I loved how the distressing turned out. I was a little scared to use this permanent, oil based distressing medium. It worked like a charm. He is made from mohair and tweezer plucked around his eyes, ears, nose and pads.
    Happy Easter and Jesus is risen!
    Holly

    Sunday, February 12, 2012

    What I've Been Doin'....

    This week has just flown by. We just had a regular week, nothing special. I have been working on some projects. The applique quilt I have shared before. It is Paper Dolls by Lori Holt. This quilt is going to be so cute. I can't wait. I did have a hard time with the background fabrics, so I had to break down and buy some. The fabrics that I had in my stash were too busy. I needed pretty pastels. I am very happy with what I ordered. I love to support our little quilt shop, but they mostly carry Civil War type prints, etc- not very many  pastels.
    Above: This block is just adorable. The mixer looks like the one I have that belonged to my Mama Marcinak. The red stitches are going to be a glass measuring cup outlined in gray. The little mess of thread under the mixing bowl is the start of the embroidered words.

    Above: I have been working on this quilt for about 4+years now- off and on. I tackled the largest piece first. I am doing a stem stitch which takes longer than a running stitch, which is what most people use. No particular reason why I choose the stem over the running other than I needed practice. I do think that stem stitch does use more floss or maybe it is just my imagination :)


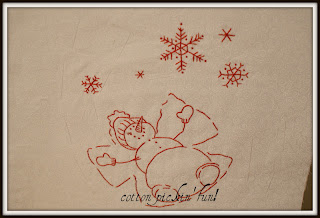
    Above: very blurry, sorry. I have not finished the snowmen. The do need their french knot features. I am saving that until I finish the last two snowflakes on this piece.

    Above: Another block I finished


    Above: What the quilt will look like when I am finished.
    Quilt pattern by Crabapple Hill Studio.

    Have an awesome Sunday!!
    Holly
    ps. I also posted on my other blog! Finally!

    Monday, January 30, 2012

    Pantry...Smantry...

     Last week I spent two days cleaning out the pantry. I couldn't believe the amount of expired stuff. We have only been in this house 8 years and I am embarrassed to admit that I found stuff that had an expiration date to use before year 2000. Granted it was only two Hamburger Help** boxes, but still.....that's pretty gross. Those two boxes have lived in three different houses, in three different pantries, in three different states. Huh?? Double yuck!! One of them even included meat in the mix. EWWWW.... Don't get me wrong, I have cleaned out the pantry at least twice a year and organized it, but never really payed attention to expiration dates. If it tastes stale, duh, throw it out. But you better believe that I am going to check dates several times a year from now on. The horrors....thank goodness we have never, never had any bug issues.  Well....here's the pantry before checking dates and organizing:
    Above: What a mess! The little red bag thing to the left of the picture is for holding plastic grocery sacks.

    Above: What I dug out of the bottom of the pantry.

    Above: Whew....much better. It still looks messy, that's why I keep the doors shut. Eventually, soon, hopefully, I am getting a bigger pantry. Behind the back wall of the pantry is another room, a mother in law suite. I would like to extend the pantry three feet into that room. This expansion would allow me to store those bulky appliances & stuff that gets used, but looks ugly on the counter. Ex: ice cream churn, blender, big mixing bowls, waffle iron, bread machine, toaster, apple peeler-corer, etc. Yes, I do have a bigger broom, that one is D#2's broom. It does come in quite handy, though.


    Above: I baked some wonderful bread the other day. It smelled so good and baked up really pretty. It was delicious. D#2 was awed by my electric knife. After I cut the first piece of bread, she begged me to cut more bread with my cool "Chain saw for cutting bread" knife. This knife is about 20 years old. Dear Hubby and I received it as a wedding gift. I love it! The cutting board was a Christmas gift from one of DH's coworkers. He made them in his home workshop. I love gifts like this. I believe we have had it for about 12 years.


    I have been working on this quilt. It is called "Paper Dolls" and it is adorable. I had stopped working on it around the beginning of November last year to concentrate on Christmas gifts. The quilt is from Lori Holt of Bee In My Bonnet. She creates the most adorable stuff. I have finished the "Sophie ties on her apron" block. It is the 2nd block on the bottom left corner. The one with the broom.

    Quilting, applique and embroidery are all used in this quilt. Don't you just love the details. I still need to put the ric rac on the apron and then this block is finished.


    Above: Here is the next block that I have started: "Kassidy bakes cookies". If you can zoom in closer you will see the back rounded part of the mixer (black fabric) is still in the tack down phase. I am using the needle turn method for appliqueing. Of all the appliqueing methods that I have used, this is my favorite.
    Above: Needle turn applique. Don't you just love the cord. It is ric rac!

    Above: Here is what the pattern sheet looks like. Lori's instructions are awesome! She explains everything. The only thing she doesn't do is tell you which fabrics she used. But that is a good thing. Customize it and don't copy. Use what you have on hand and don't buy more.

    Above: Once you cut out the fabric pieces, these are basically the only tools you will need to applique. The bottle with the blue top is baste glue. I have never used this stuff before and now that I have, I love it. It does just what it's name suggests. It bastes the fabric down. Just put a tiny drop of glue on your base fabric and then place the piece to be appliqued on top of the glue. No pins or baste stitching necessary. Now just applique until  your hearts content! or your fingers become numb. Your choice!

    Above: The hardest thing for me, was choosing the background fabrics. I didn't want them too busy, but not too plain either. So I compromised. Some are plain and some have subtle backgrounds. Appliqueing is so much fun. If you want to try it, start small. This quilt is suppose to be a block of the month quilt, but since my local quilt store is not offering it, I am doing it at home by myself. I can do one block a month, maybe even two. We'll see.......

    Anyway have a great day and happy appliqueing,
    Holly

    Friday, January 13, 2012

    Shazam! It's Cold and Windy!

    Brrrr..... It's been cold here and windy! I think the low tonight is 25 with 20 mph winds!! Those cold, icy fingers whip through the house freezing everyone. I know that the people up North think we are so wimpy down here when it drops below 65 degrees. But hey...we don't complain when it's 95 and the humidity is 100%. We just accept our Dolly Parton style hair and continue on about our business.

    Above: Yep....she's definitely got it going on!

    The night before last, I cooked up a crock pot full of BBQ chicken and had at least 5 large chicken breasts left. I love cooking this way because (1) I don't have to heat up the stove and (2) I can prepare dinner in the morning and forget about it (*not that heating up the stove is a big deal, I just turn the knob, but I guess I do save energy and plus--(3) crock pot cooking is just plain fun!). Salad and corn completed the meal. The crock pot is my favorite way to cook chicken, pork and beef. Since I had so much chicken left I thought that a big pot of Brunswick Stew was in order.  Dear Sweet Son had the misfortune of saying "Not stew again!" Well, in my most motherly voice (kind of like my mother use to say but not these exact words) "OH NO YOU DI'INT....for that son, you may go outside and collect rock and sticks for your stew!"


    Well....then after realizing his gaffe and looking quite pitiful, I let him have some and would have even let him have some more, if he asked-because your momma still loves you, even when you insult her stew.

    Brunswick Stew
    2 quarts whole tomatoes (I did use diced)
    1 T. olive oil
    2 medium onions
    4 garlic cloves (I didn't use garlic)
    16 oz. BBQ Sauce (I used Sweet Baby Ray's Vidalia BBQ Sauce)
    8 cups shredded smoked pork or chicken or both (I only had chicken)
    2 cups lima beans ( I used 2 cans)
    2 cups corn kernels ( I used 2 cans)
    3 cups peeled , diced potatoes
    1/2 t. liquid smoke (you could technically leave this out, I couldn't taste the 1/2 t.)
    1 t. apple cider vinegar ( see comment above)
    3 t. yellow mustart (see comment above)

    I used my large stew pot. This recipe makes a lot. You can always cut it in half. I did freeze the leftovers to reheat for a quick dinner this winter.

    In stew pot, saute onions in olive oil. Add tomatoes and remaining ingredients. Cook forever (or 20-30 minutes) over medium heat. I cooked it for about 3-4 hours adding the potatoes and lima beans the last 30 minutes. For the true Southern experience, serve it with white bread (Sunbeam King).

    Here's a picture of the Brunswick Stew. Sorry it's in a plastic bowl. I didn't remember to take a picture until I was freezing it. 
                                        
                                                            Have a wonderful night and stay warm!!
                                                                                        Holly